

Pinwheel cards are fun little creations that feature a distinctive pinwheel pattern both when open and when folded closed. Although it's not really needed, a belly band adds an extra cute element and a space for additional embellishments. TEMPLATE: 1. Start with a thick piece of double-sided, 12" x 12" patterned paper. Around 180gsm is a good weight without being too heavy. I also chose paper that could be used as a lining for the inside of my card, so I ended up with very few offcuts. Trim the paper to the following sizes: - 8" x 8" - 4" x 4" - 12" x 11/2" - 12" x 1" 2. Start with the 8" x 8" piece of paper. Measure and mark 3" and 5" from the left hand corner. Rotate the paper 90 degrees and repeat. Rotate and repeat two more times until you have marked all four sides. 3. If you have a score board with a right-angle wedge, place one side of your paper against the wedge and score across the paper from the first 3" line. It should line up with the 5" line on the next edge. (See the template for correct placement). Repeat for all four sides of the paper. 4. Fold along each score line. 5. You will notice small triangles where the score lines intersect. Use a pair of small, sharp scissors to remove each of the four triangles. (See the template for correct placement). 6. Remove the right-angle wedge from your score board. Place the paper on your score board and score at 1" until you reach the point of the small triangle you removed in the previous step. (Refer to template for correct placement). Rotate the paper 90 degrees and repeat. Repeat twice more for a total of four score lines. 7. Fold the first large corner into the centre of the card. Fold the 1" strip back over the large corner and secure with glue or double-sided tape. Repeat for all four corners. REVERSE SIDE OF CARD: 8. To fold the card, bring one of the corners into the centre. To get the fold correct, you always want to cover the high point, so the second fold will be whichever corner covers the point - in my case, that's the corner on the left (clockwise). Then the top corner. The last corner is tucked under the very first one, which is a little tricky at first. You have to bend and curve the paper and slightly open the other folds to ease the last section into place. 9. To decorate, secure the 4" x 4" piece of patterned paper in the centre. If desired, stamp a sentiment or image before gluing in place. 10. Secure the two 12" strips together - the narrow one on top of the wider piece. Wrap around the card, secure the ends together with glue, and trim off any excess to form the belly band. Add an image or embellishment over the seam, and add other decorations as desired. Products:

Create this Pinwheel Tower card using Country Flowers by Stampin' Up! #DebbieMageed #secretstostamping #FunFold #stampinup

We found the perfect thing to liven up your summer projects. This folded pinwheel embellishment will work on anything that is pieced with a four-patch...

**Check out my pattern bundles and save! https://www.etsy.com/shop/JadedSpadeCreations This easy-to-follow pattern results in this stunning pinwheel wall hanging. Easily increase the number of blocks to create a larger project - up to King size quilts! This wall hanging pattern requires only 80 5" charm squares plus fabric for borders and backing. Pinwheel wall hanging finishes 25" square with the optional borders. Pattern includes step-by-step instructions complete with color photos. Follow the pattern exactly for best results and in the very last step the pinwheels will appear to spin! Surprise! Get super creative and try different color layouts! Use fabric from your stash and create scrappy pinwheels, try a black background and really make those pinwheels pop! You may sell items made from this pattern, but please credit me for the pattern. You may not use my photos sell your finished product. Do not share, copy, or reproduce any part of this pattern. **Check out my pattern bundles and save! https://www.etsy.com/shop/JadedSpadeCreations To see new patterns, discount codes, and keep up with projects I'm working on please follow me at htps://www.jadedspadecreations.com

It's a fun fold and a 3-D all in one for today. Today fun fold Pinwheel Tower card will fit in an A-2 size envelope. They are 3-D when opening but lay flat to place in an envelope so friendly to

Add An Element Of Surprise To Your Wall Quilt. Using a mixed combination of a pinwheel in a cathedral fold, a new and exciting block creates a stunning feature on your wall. The Pinwheel Surprise i…

Pinwheel cards are fun little creations that feature a distinctive pinwheel pattern both when open and when folded closed. Although it's not really needed, a belly band adds an extra cute element and a space for additional embellishments. TEMPLATE: 1. Start with a thick piece of double-sided, 12" x 12" patterned paper. Around 180gsm is a good weight without being too heavy. I also chose paper that could be used as a lining for the inside of my card, so I ended up with very few offcuts. Trim the paper to the following sizes: - 8" x 8" - 4" x 4" - 12" x 11/2" - 12" x 1" 2. Start with the 8" x 8" piece of paper. Measure and mark 3" and 5" from the left hand corner. Rotate the paper 90 degrees and repeat. Rotate and repeat two more times until you have marked all four sides. 3. If you have a score board with a right-angle wedge, place one side of your paper against the wedge and score across the paper from the first 3" line. It should line up with the 5" line on the next edge. (See the template for correct placement). Repeat for all four sides of the paper. 4. Fold along each score line. 5. You will notice small triangles where the score lines intersect. Use a pair of small, sharp scissors to remove each of the four triangles. (See the template for correct placement). 6. Remove the right-angle wedge from your score board. Place the paper on your score board and score at 1" until you reach the point of the small triangle you removed in the previous step. (Refer to template for correct placement). Rotate the paper 90 degrees and repeat. Repeat twice more for a total of four score lines. 7. Fold the first large corner into the centre of the card. Fold the 1" strip back over the large corner and secure with glue or double-sided tape. Repeat for all four corners. REVERSE SIDE OF CARD: 8. To fold the card, bring one of the corners into the centre. To get the fold correct, you always want to cover the high point, so the second fold will be whichever corner covers the point - in my case, that's the corner on the left (clockwise). Then the top corner. The last corner is tucked under the very first one, which is a little tricky at first. You have to bend and curve the paper and slightly open the other folds to ease the last section into place. 9. To decorate, secure the 4" x 4" piece of patterned paper in the centre. If desired, stamp a sentiment or image before gluing in place. 10. Secure the two 12" strips together - the narrow one on top of the wider piece. Wrap around the card, secure the ends together with glue, and trim off any excess to form the belly band. Add an image or embellishment over the seam, and add other decorations as desired. Products:

How many charm square packs do you have at home? I don’t collect charm squares, I don’t buy everything that is new or I like and still I have 4 charm packs! So if you don’t know how to use them, here is an idea: 3D pinwheels. You can make this design as scrappy as […]

Fun Fold Class to Go! for September is a Pinwheel Fold. Beautiful wedding card using gorgeous Designer Series Paper.

Create this Pinwheel Tower card using Country Flowers by Stampin' Up! #DebbieMageed #secretstostamping #FunFold #stampinup

The inventor of the pinwheel is not known, but wind-driven whirligigs have existed in China since 400 BC. Pinwheels are simple child’s toys made of a wheel of paper or plastic curls attached at its axle to a stick by a pin. They are designed to spin when blown upon by a person or by the wind. Pinwheels are considered a predecessor to more complex whirligigs. Today’s style of pinwheels is rooted in East Asia, and the design is typical of a Japanese origami folding technique for a pinwheel.

Fun 3D pinwheels quilt patterns; great for ombre fabric and also charm squares friendly.

Scrappy Pinwheel in a Square. Three challenges in one! I’m so excited to share this new block with you all! Making a pinwheel block is a challenge, but then so is a square in a square block, – cutting all those extra triangles and then getting them lined up. More often than not these blocks … Continue reading Scrappy Pinwheel in a Square →

Did you know that the chocolate chip cookie was a serendipitous discovery? When Ruth Wakefield,…

I would like to share a model today that I invented based on Hedi Kyle's Blizzard Fold book (instructions are given in the Penland Book of ...

You can follow these clear, step by step directions to make this fun pinwheel card. It's perfect for so many occasions.

Journey to Silver Elite Blog Hop: Welcoming the new and Cherish the Old is the theme. I decided to create a Pinwheel Tower Card.

How many charm square packs do you have at home? I don’t collect charm squares, I don’t buy everything that is new or I like and still I have 4 charm packs! So if you don’t know how to use them, here is an idea: 3D pinwheels. You can make this design as scrappy as […]

Make paper pinwheels and paint them with watercolors, add beads and hang up as beautiful decor.

3 dimensional quilt blocks are a lot of fun. They add a lot of dimension to the quilt and even though they might be a bit confusing to begin with, once you get the hang of it, they are super simple.

Hi everyone, today I’m sharing this unusual Tiered Pinwheel Card. I’ve made this style without the tiered panels before in a few sizes and you can find that tutorial here. This one fold…

How many charm square packs do you have at home? I don’t collect charm squares, I don’t buy everything that is new or I like and still I have 4 charm packs! So if you don’t know how to use them, here is an idea: 3D pinwheels. You can make this design as scrappy as […]

Get creative and then watch the wind blow with this DIY Pinwheels Kit from Djeco. With easy to follow instructions to make assembly a breeze, children can assemble, fold and attach the pastel-colored illustrated sheets onto the wooden rod to create stunning windmills. As the mills turn when the wind blows, the colors blend, revealing new patterns. The durable coated paper sheets ensure these decorative windmills will last through many windy and fun-filled days!

This origami pinwheel is also full of childhood memories, fold one of the pinwheels with your child and take them back to the past. If you are new to origami, start here from our beginner

Add a whimsical touch to your table with Chinet's pinwheel napkin fold guide. Follow our easy instructions to bring charm to your dining experience.

This origami pinwheel is also full of childhood memories, fold one of the pinwheels with your child and take them back to the past. If you are new to origami, start here from our beginner

On July 7th I shared how to make a Four-Panel Pinwheel Tower card. It's a super popular fun fold card right now - perfect for showing off beautiful designer paper patterns. Well, there is

Binding is the last step in making a quilt. Whether you use premade bias tape…

Easy step by step DIY pinwheel guide with pictures to make paper pinwheels of all sizes. This is a great summer craft for kids of all ages.

Today I'm going to show you how to make pinwheels - they are so pretty and they really spin! These are a simple, summertime craft project you can make with household materials. Since I wanted to make these for my kids, I really needed to find a way to make sure the pinwheel wouldn't break apart and send pieces flying everywhere! This method works beautifully! I had posted another pinwheel project before, but I just wasn't happy with the results. You can check out my other paper pinwheels tutorial here, but keep in mind that I much prefer this new

Make this easy pinwheel fun fold card - and to change it into a quilt card, just press it flat! How easy is that? (The Hydrangea Haven Designer Series Paper is used here.) It only takes three squares of patterned paper! Making Easy Pinwheel Cards & Quilt Cards! To make the pinwheels, this is all you need! If you want an added layer (check out the photo below) this is the change you will make. Now - for some other patterned papers - like the Snail Mail Designer Series Paper for some adorable cards for kids. How about the True

SPRINGY THINGY CARD TUTORIAL It's time for me to share my weekly Tuesday tip or technique. This tutorial fell out of my tips/techniques book as I moved it last night and so got chosen for today's effort. It makes a card front that the receiver pulls open and the card opens out like a spring to see an inner 20cm square area. Images of a completed card using this technique are below these instructions. Practice this on some scrap paper first. MATERIALS 20cm square piece of card stock or decorative paper of your choice. Pre colour the card if you wish. I'll use white card stock so you can clearly see what to do. Pencil, rubber, ruler, craft knife, craft mat and bone scorer. HOW TOO 1) On all sides measure and make a light pencil dot at the 5cm, 10cm and 15cm mark. On my sample I will use a black marker so you can see what I did easily. 2) From the 5cm mark at the left and right side measure and mark a dot at the 10cm mark 3) From the 10cm mark at the left and right side measure in and mark a dot in at the 5cm mark from each side 4) From the 15cm mark at the left and right side measure and mark a dot at the 10cm mark. These dots make a large diamond. 5) Score between all these dots. In my image I have drawn dashes to show you were to score 6) At the top 15cm mark score down to the right side of the diamond. At the 15cm mark at right edge, score across to the bottom of the diamond. At the 5cm mark on the bottom edge, score up to the left side of the diamond. Lastly at the 5cm mark at the left edge, score across to the top of the diamond. See dashed marks I have marked for you on my sample. All these score lines will be mountain folds. That is you bend the scored line back on itself to make a mountain. 7) At the 10cm mark on all sides score into the points on the diamond. See dashed areas on my sample. These scored lines and the scored lines for the diamond are all valley folds. That is you bend the scored line in on itself to make a little valley. Here is my sample with all the scored lines bent to their respective mountain and valley folds. 8) Now all you do is gently fold the card in on itself. Start on one side and then work your way around. If you have all the scored correct lines and folds it sort of winds in like a spring. It should look like this at the front and this at the back. Rub off all marked pencil dots. After I made my sample above for you I painted the card stock with white gesso, sprayed it with various sprays. Stamped and added embellishments to turn it into a steam punk card. I then layered and stuck it to a base card. As mine is fairly embellished it doesn't fold completely flat. This is m Springy Thingy Card open Some close ups of the folded card part. Hugs Annette In Oz

Make paper pinwheels and paint them with watercolors, add beads and hang up as beautiful decor.

Binding is the last step in making a quilt. Whether you use premade bias tape…

4-patch textured quilt Textured quilt You can buy the quilt tutorials in one single PDF document. The document contains a step by step instructions with colour photos in a 60+ page booklet each. F…
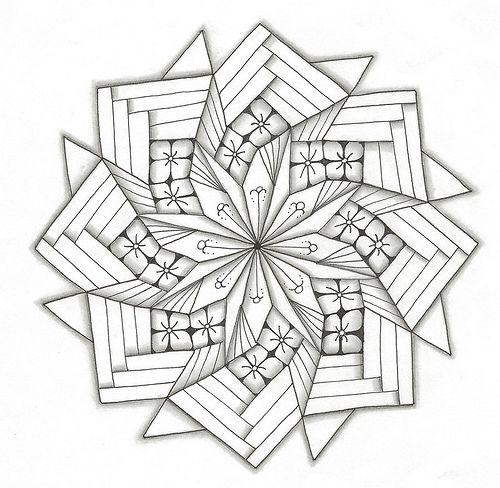
About a month or so ago I did a set of 5 Zendala’s based on templates from Geneviève Crabe’s “Zendala Magic Flickr group”. Shortly thereafter I found myself in a bit of a gr…

Thanks so much for joining me yesterday for Pinwheel card video tutorial on my weekly Facebook live video series!! If you missed the video to see how to put together these amazing Pinwheel Tower cards, scroll to the bottom to catch the replay! My creation includes Polished Pink, Melon Mambo and Granny Apple Green cardstock, the Shaded Summer stamp set, PLUS 2 sneak peeks from the upcoming Aug-Sept Sale-a-Bration gift selection: Summer Shadows dies (coordinates with Shaded Summer set), and the Beautifully Penned designer paper! I love the contrast and bright cheery colors when the
