

Inside you'll find an easy Gee’s Bend Quilt art lesson for how to make a paper quilt project with your kids. Grab it for your classroom now (it’s free!)

Here is another Free Pattern Day with more than 40 free sewing and quilting patterns for Kaffe Fassett fabrics! There are patterns for qui...

A modern take on a classic American heirloom, the Stillwater Floral Quilt’s bold color-blocking and symmetry pay homage to traditional applique, while its mirrored floral motif makes it easy to style in either direction. The perfect layering piece throughout the seasons, this jacquard woven textile’s cozy weight and lived-in texture are sure to be forever cherished. Made in Portugal from 100% cotton. A Schoolhouse Original. • A Schoolhouse Original • Handcrafted from 100% cotton • Cozy, jacquard woven textile

I love how bright and cheerful this sunshine baby quilt is! I’m a big fan of bold and bright colors. This was made using fabrics from my stash...

9-patch scrap quilt, nine patch quilt, quilt top

The craft blog of pattern designer Jeni Baker. Creative adventures in quilting, sewing, and color. Plus free sewing and quilting tutorials.

Do you love scrap quilts? Do you wish you could create your own? Today I share time tested tips and tricks for scrap quilting success.

Happy Monday again! I created this coloring sheet to use for the #HillsideHousesQAL to help you decide the placement of your colors if you're making it different than mine. It's also a good reference to use no matter how you decide to make it because it all the houses are numbered and I'll be referring the numbers during the quilt-along. Enjoy! To download a PDF copy, click here.

Okey Dokey, here is my first attempt at a tutorial…feedback encouraged! Hopefully at least some of this makes sense. :) I’m going to explain the ridiculous way I figured out how to do t…

The craft blog of pattern designer Jeni Baker. Creative adventures in quilting, sewing, and color. Plus free sewing and quilting tutorials.

This sewing tutorial will focus on bargello quilt patterns.

52 of my favorite modern quilts from QuiltCon 2024.

Such a delicate touch and so easy to do. Choose your contrasting fabric and learn how to add a flange to your binding, giving just the right pop to your quilt!

Imagine my excitement when I learned Renee Nanneman (fabric designer for Andover and publisher for Need'lLove) chose my Cotton Daisies pattern to create this beautiful quilt using her new fabric line, Beehive. And...it's hanging in the Andover booth at Quilt Festival in Houston! Cotton Daisies quilt pattern can be found on my website: Laughyourselfintostitches.com Digital Downloads and Mailed Patterns Renee was so gracious to take a couple photos for me and i asked her to make sure she was in each picture!! She is the kindest person! Renee added a gold flange to her Cotton Daisies quilt, which adds such a nice touch! The quilting is gorgeous too! I can't take any credit for it...but whoever quilted this for Renee...it's wonderful! Here is my Cotton Daisies quilt. I literally pulled fabrics from my stash to make this and when i saw Renee's quilt, oh my gosh!! I loooove the softness of her Beehive fabrics! And the pattern cover...showing an alternative colorway...i think this quilt has soooo many color options! Looking for the pattern? I have it available in instant pdf's or mailed copies. Find them in My Etsy Shop And if you wait a bit, (Renee is at market right now) I bet she'll be offering some Cotton Daisies kits using her Beehive fabrics/pattern included! Thanks for stopping by! Learn, Share, Quilt! ~karen

Our newest pattern Orchard Stars is here! If you haven't seen, the Cover Orchard Stars is up on the blog too! Today, I am sharing our Satsuma Orchard Stars! This quilt showcases our Two Color Design option. I have always enjoyed a two color quilt and this design felt like it needed a two color option. It makes the cou

A Common Dishwashing Liquid Can Remove Migrating Dye! Have you ever finished a quilt only to have it bleed in the wash? While the first impulse is to panic, don’t worry. Dawn dishwashing liquid can usually remove the migrated dye. One year while putting her holiday decorations away Julie Cefalu from The Crafty Quilter discovered …

Our patchwork pattern invites you to a unique and colorful experience. This majestic lion consists of a palette of 24 distinct colors, carefully selected to enhance the beauty and vitality of this patchwork design. Upon downloading the files, you'll find 5 PDFs: instructions, color palette, visual pattern in A1 format, and the 20 sheets of A4 size to create a giant visual pattern that allows you to work comfortably on your quilt. The pattern instructions cover the following topics: 1.Introduction to the Direct Fabric Marking Technique for Patchwork 2.Materials Needed for the Direct Fabric Marking Technique 3.Marking the design on the base fabric 4.Cutting the pieces 5.Alignment of the pieces on the base fabric 6.Temporary placement of the pieces 7.Appliqué or Joining Seam 8.Adjustments and Details 9.Ironing and Detailed Finishing 10.Quilting Process Immerse yourself in the fascinating world of creativity and artistic expression with our lion design, a challenging masterpiece that questions patchwork conventions! Picture a majestic lion taking shape from 20 A4 sheets, each loaded with meaning and potential! Why embark on this thrilling journey? Impressive Size: Your lion will come to life in a size that captivates and becomes the centerpiece of any space. Who said patchwork couldn't be striking and captivating? Rewarding Process: This is not just a project; it's a rewarding challenge. Creating your lion may require effort, but each stitch carries the satisfaction of seeing your masterpiece come to life. Numbered Pieces and Vibrant Colors: Each piece tells a story. Numbered for guidance and colored to inspire, these pieces will form a lion that transcends expectations. Unlimited Customization: Color or black and white? You decide! Customize your lion to fit your style and vision. Versatility is in your hands. Variety of Fabrics, Variety of Emotions: Designed for 24 different colors, this pattern ensures each lion is unique. Every color tells a story, and you are the storyteller. Option A1 - The Entire Epic in One Sheet: The A1 option (594 x 841 mm) gives you the complete experience in one glance. A visual statement that elevates your creation to new heights. Option B. The Epic divided into 20 A4 Sheets to form a giant visual pattern. The Story of Creation: Imagine sitting in your creative corner, tasked with bringing to life a lion symbolizing strength and courage. Every print, every cut, is a step toward creating a unique piece that can decorate any corner of your home or become a meaningful gift for those who appreciate the lion's values. Download now and bring your patchwork lion to life! An experience that transcends expectations, because your creativity deserves a masterpiece. Make patchwork an expression of your own creative epic! Important Details: This pattern is designed for use with 24 different fabric colors, in addition to the optional base quilt whose color is your choice. It is crucial that selected colors are similar to those presented in the color palette to achieve the desired effect in the lion's appearance.

Get started with this beginner's guide to crumb quilting. Explore the materials, techniques, and tips for completing a beautiful quilt!

I thought I'd post a few pictures I took along the way making Blue Ridge Mtn. (This is the quilt they chose to be the cover of my book!)...

I did this lesson with seventh graders, most of who have not learned anything about perspective drawing. This was a wonderful introduction to perspective drawing & landscapes. I would recommend it for 5th-7th grade. We did a 1 point perspective worksheet first. The use of soft pastel on colored construction paper is no fail. I love setting the kids up with a project that is destined to look great. Students had to draw a landscape and include crop lines some how. Tracing in sharpie before applying the pastel was optional. These were a few of the examples I showed the kids. If you'd like my entire slide show leave your email in the comments and I'll happily send it along to you. *** I now have my slide show available via this link. *** There are so many great Van Gogh examples, you could easily tie it in with a Van Gogh lesson. Some more great finished products:

Punch Lines is an easy and free quilt pattern from Wren Collective. This modern quilt pattern is fast to make and beginner friendly!
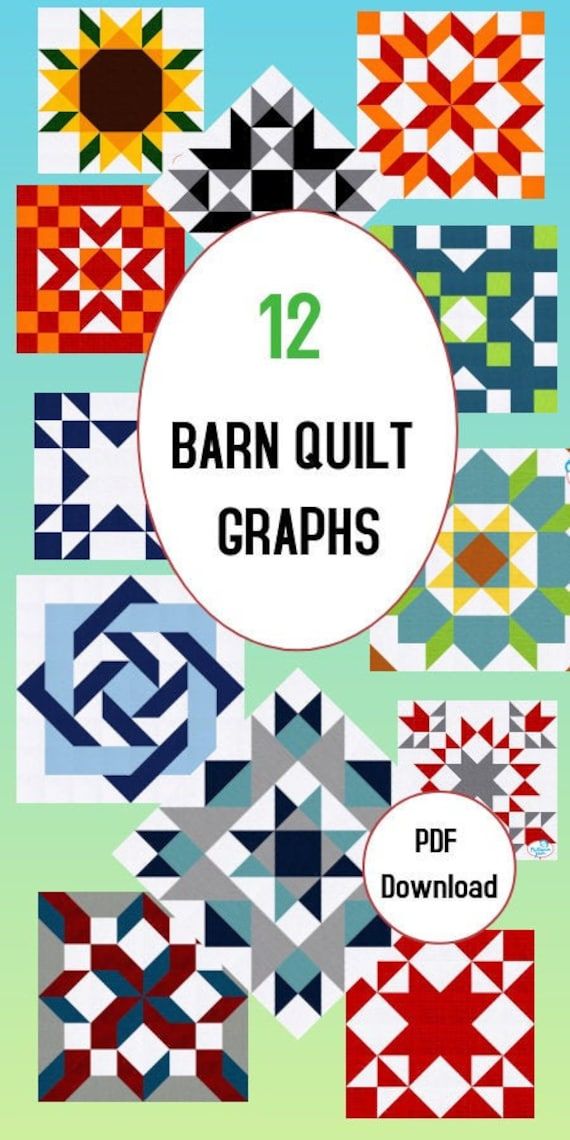
This listing is for a pdf download of 12 (plus one to make 13) full color graphs of Barn Quilts. ***This is not the finished wood barn quilt itself product.*** You would use the graphs as a guide to mark your design (usually with a straight edge and pencil after you prime your wood.) Example: You have a 24" square piece of wood that has been primed.. So say the graph is 8 squares across and down. Each square in this case would represent 3" (to equal 24") . If you want it bigger or smaller...each square could represent 2" or 4"...etc. (It's just like quilting...but with wood.) Colors can also easily be changed. Knowledge of making wood barn quilts is recommended as no painting or other directions are included. These are the PDF color graphs only.

A quilt back does not have to be boring. Sharing my 18 ideas for a pieced backing for quilts to make the design process a little easier.

If you’re looking for a timeless, classic and fast baby quilt, you’ve come to the right place. (P.S. I also have a separate Irish Chain tutorial if you want to make a bed sized one which you can find here .

Free large hexagon quilt pattern & template. Make a simple hexagon quilt with no Y seams with our tutorial. Uses half hexagon quilt pieces.

The bargello technique can be used to create backgrounds for applique, to showcase landscape prints, and to use up your stash. In a previou...

My 34½" X 50" Seaglass quilt is finished. Already, I want to make another one! It was fun choosing fabric scraps (and cutting into some sta...

31 Days of Everyday Quilt Inspiration just went from "everyday" to "extraordinary"! Today we are looking at volcano colours for our next quilt inspiration.

52 of my favorite modern quilts from QuiltCon 2024.

Learn to make a puff quilt with precut fabric with a step by step guide and video tutorial.

There is something so classic and simple about a patchwork square quilt. It feels homey, vintage, yet simple enough to be classified as

Happy Wednesday! Today I wanted to share my secret for preventing fabrics from bleeding when I wash my handmade quilts. I'll also share my basic instructions for washing/drying quilts. I have mentioned this "secret" a few different times over the years, but I wanted to share it in a dedicated post. As a quilter there are few things worse than pulling your finished quilt out of the dryer to discover that the fabrics in your quilt have bled. When I've experience issues with washing my quilts in the past it has felt pretty devastating. For me a quilt isn't finished until it's had a trip through the washer and dryer, so when something goes wrong during this "last step" it feels like I didn't stick the landing! That satisfied feeling I'm expecting to feel quickly turns into frustration and sadness. I think it's safe to say we all want to avoid that! Before we dive in I want to preface this advice by saying that I typically do not prewash my fabric for quilts. Specifically quilting cottons. When I'm making quilts from fabric that's intended more for garments like double gauze, chambray or lawn, I always prewash the fabric before making the quilt. You could follow the steps below for pre-washing fabrics for a quilt if you'd like! While we're on the general topic of avoiding quilt washing issues, save yourself some trouble and do not use a water soluble/disappearing ink marker on a visible part of your quilt. I learned the hard way that it's removal is not always straightforward (short story: don't mix disappearing ink markers with stain fighting products and hot water). Read more about that incident here: Sherbet Pips Quilt & a Lesson Learned. The fabric bleeding mishap that was the last straw was my Mendocino Dreams Quilt that I made back in 2012. It was a big quilt, so I used two Shout Color Catchers* when I washed it. And I still had fabric bleeding in a few places. I was so upset (this quilt was easily 40+ hours of work), I knew I needed to figure out a different method for washing my quilts to avoid this in the future. The secret is... table salt! No more expensive color catchers for me, just plain old table salt. I've used iodized, non-iodized, name brand, generic brand and it doesn't seem to matter, they all work. I have not tested this with kosher or sea salt. I'm happy to report that since I started using this trick, I have had ZERO issues with fabric bleeding. I think I started doing this around 2013, and I have made a lot of quilts since then. Here's how to use it when washing your quilt: Disclaimer: The results I've acheived using the following steps have worked for me, but I cannot guarantee that they will work for you. Please follow these instructions at your own risk and use your own judgement to decide what is right for you, your quilts, and your washing machine. 1. You'll want to start with a finished quilt! I am always so excited to wash mine so I usually get right up from my machine when I finish binding and head for our laundry nook. 2. Add your quilt to the washing machine. For either a top loading (what I've got!), or a front loading, add 1/2 cup - 1 cup of table salt to the machine, right in with the quilt. I use more or less depending on the size of the quilt. (I usually only do this step the first time I wash a quilt, but if I'm particularly worried about bleeds I'll do it on subsequent washes too.) 3. Add your preferred laundry detergent. I like to use a laundry detergent without fragrance or dyes (I use these tablets* specifically). It's surprising how many conventional laundry products have dye in them. If your liquid (or pod) detergent has a color to it, it most likely is from a synthetic dye. I recommend avoiding this if you can, when washing a handmade quilt. This is the liquid detergent* I used for years before switching to tablets, which is available at most big box or grocery stores. 4. Set your machine to a gentle cycle and wash with cold water. 5. SET A TIMER. This is so important. Probably the most important thing you can do to prevent fabric bleeding in your quilt. You want your wet quilt to sit in the machine, after the wash cycle has finished, for as little time as possible. In my experience, letting wet fabric sit against wet fabric often results in fabric bleeding. 10-15 minutes shouldn't be anything to panic about, but I would try to avoid anything longer than that. Definitely would not recommend throwing a quilt in the wash before you go out to run errands or something! 6. Check your quilt for stains or bleeds before drying it. It's easier to deal with them before they head into the dryer and get set. 7. Dry your quilt. There is a lot of room for personal preference here. For me, I absolutely love the wrinkle crinkle on a finished quilt, so I dry my quilt completely in the dryer, usually on medium heat. I used wool dryer balls* to help it dry evenly, minimize static and make it nice and fluffy! If your quilt is particularly delicate or you want to minimize shrinking, I would recommend drying it on lower heat and pulling it out of the dryer early to let it air dry the rest of the way. An interesting thing about this trick is that if you search "salt fabric bleeding" or "using salt in laundry" it actually pulls up a few "laundry hacks that didn't work" type of articles. This is a good reminder that it may not work in every situation for every person. I feel confident sharing this trick anyways because it has worked for me for the last 50+ quilts I've made. Just remember to pair it with good quilt washing practices like using cold water and not letting the quilt sit wet in the washer for too long. I wanted to share a few specific quilts as testimontials to this method. The following quilts were washed using these steps and came through unscathed with no bleeds. A few were quilts with blocks made by a group of people (so a large variety of fabrics), and or quilts with high-contrast and/or deep colors. Black and White Heart Quilt for Amanda Fantastic Leftovers Quilt Finished Scrappy Pineapple Quilt Tula Pink Kaleidoscope Quilt I hope you've enjoyed this informational tutorial! I have lots of other tutorials for everything from quilts, pillows, bags, and holiday items to informational series and techniques. Find all my tutorials here: Tutorials. My online shop is filled with patterns for quilts and bags. Find my patterns here: Jeni Baker Patterns If you make something using one of my tutorials or patterns, I hope you'll tag me @jenib320 and use my hashtag #jenibaker on instagram! Don't forget to pin this post to your Pinterest for future reference! :) Happy Sewing! *Note: Any links marked with an asterisk in this post are affiliate links. This means if you click through and buy something, I make a small commission, at no extra cost to you.
