

Download the FREE Ombre Puff Quilt Pattern here! If you've been around for any amount of time, you might've seen my Puff Quilt that my grandmother made for me. I love this thing SO much. She used various scrap fabrics and clothing to create this very dense, yet very snuggly quilt. . . . When I look at this quilt, I see something new each time. Recycled tablecloths from the 80s, pieces of my grandfathers button-down shirts, left-over fabrics from previous quilt projects. The list goes on. Some fabrics are used multiple times within the quilt, while other fabrics are only represented once. I love looking over all of the puffs and finding all of the similarities and differences between the squares. . . . My Granny made this for me when I was 7 years old. I absolutely LOVE that she created a tag for this quilt. I also love that she referred to the quilt as a

52 of my favorite modern quilts from QuiltCon 2024.

Sewing a quilted patchwork jacket from scratch - cutting your fabric, a suitable sewing pattern and hand stitching

I told myself I'd never make another puff quilt. Yet, here I am.....sharing about my second puff quilt. (haha!) Don't get me wrong, I loved the process of making my first puff quilt, which you can read about here, but I honestly thought that we'd never have the need for another one. Well, over the last year, I slowly forgot how much work they are (haha) and I started getting the itch to do the process all over again! Peter uses my original puff quilt alllllll the time. He loves the weight of it, but his only complaint was that it wasn't long enough. I made the

Download our printable quilt size chart with the dimensions for all the standard quilt sizes. Save for all your future quilt size dilemmas.

I told myself I'd never make another puff quilt. Yet, here I am.....sharing about my second puff quilt. (haha!) Don't get me wrong, I loved the process of making my first puff quilt, which you can read about here, but I honestly thought that we'd never have the need for another one. Well, over the last year, I slowly forgot how much work they are (haha) and I started getting the itch to do the process all over again! Peter uses my original puff quilt alllllll the time. He loves the weight of it, but his only complaint was that it wasn't long enough. I made the

Download the FREE Ombre Puff Quilt Pattern here! If you've been around for any amount of time, you might've seen my Puff Quilt that my grandmother made for me. I love this thing SO much. She used various scrap fabrics and clothing to create this very dense, yet very snuggly quilt. . . . When I look at this quilt, I see something new each time. Recycled tablecloths from the 80s, pieces of my grandfathers button-down shirts, left-over fabrics from previous quilt projects. The list goes on. Some fabrics are used multiple times within the quilt, while other fabrics are only represented once. I love looking over all of the puffs and finding all of the similarities and differences between the squares. . . . My Granny made this for me when I was 7 years old. I absolutely LOVE that she created a tag for this quilt. I also love that she referred to the quilt as a

Gustav Klimt (July 14, 1862 – February 6, 1918) was an Austrian symbolist painter and one of the most prominent members of the Vienna Secession movement.

I've had the chance to review the book Free Motion Quilting for Beginners (and those who think they can't), by Molly Hanson. I love that title! I'm a big proponent of quilting your own quilts, as you know, and I've read a lot of books about free motion quilting. I like how everyone presents the information in their own personal way....there is always more to learn! This book presents all the practical information you need to get started. More importantly, it gives you the confidence to jump in and give free motion quilting a try. There are 15 projects in the book that encourage you to start small and increase your comfort level with free motion quilting before you tackle something larger, like a quilt. What I love most about this book is Molly's tone of encouragement throughout the text and the projects. She is great at guiding you though the entire process! I've done a lot of free motion quilting and I love how relaxing it can be. I also know how easy it can be to get in a rut. I challenged myself to get out of my box, so to speak and try some new-to-me, designs. I gave this squared off stippling pattern a try and it went pretty well! I had to slow down and think about where I was going from time to time, but it was fun! I could see doing this all over a whole quilt. I also quilted a few swatches of different designs and I turned them into a set of coasters. Binding them was a little fiddly, but totally worth it! (I can say that now that they are done. Ha!) These are great because I not only used scraps of fabric, but scraps of batting as well. Hurray! I'm happy to count these as scrap project #94/101. If you would like the chance to win an e-book copy of Free Motion Quilting for Beginners, please leave me a comment in this post. In your comment, I'd love to hear what your favorite go-to FMQ pattern is. Or, if you are new to FMQ, I'd like to hear what pattern you would like to master. I will pick winner in a few days!

Visit the post for more.

Puntuale come le tasse di fine anno ecco il tradizionale post sul colore Pantone dell'anno 2024! PANTONE 13-1024 Peach Fuzz è il colore dell'anno 2024 secondo PANTONE Qual è il colore Pantone 2024? Il colore Pantone 2024 è chiamato Peach Fuzz 13-1024, una tonalità di pesca delicata e morbida,

In "TOAD-SPO - October inspired color palette for your next quilt," we capture the essence of autumn as a quilt-making season. The article introduces the Intertwined Quilt pattern, which showcases a rich and inviting color scheme of deep purples, vibrant yellows, and warm oranges, evoking the cozy ambiance of fall. The piece delves into fabric selection, color organization, and gradient effects, offering insights into the creative process.

Reference sheets that help when you’re needing the exact answer you seek! Bedding Measurements Basic Setting Size Chart Quilt Back Yardage Quilt Size Reference Chart Related Posts Dresden Quilt Block SwapI can not believe I didn't participate in any swaps in 2018! 2019 will be… Free Quilting Patterns for InspirationDid you know that I offer ... Read More about Quilting Tip Sheets

Sewing with knits doesn't have to be stressful! Learn how to make an elegant Bohemian Garden shrug and read tips for sewing with knits.

Hand quilting is the technique of sewing together the three layers of a quilt (batting between two layers of fabric) in a decorative freehand stitch.

Enjoy these easy and fun cheat sheets/charts for quilters from Art Gallery Fabrics ®. No Waste Flying Geese, Magic 8 HST, basic HST, Four at a Time HST etc.

I decided to make a little sheet illustrating the number of squares you could cut from a fat quarter based on the size you needed. This way, I won't have to do so much math! Ha. It's probably best for my brain to have to do math but this is just so much easier and prettier to look at than a calculator. View the 8.5"x11" version here. View all of my cutting guides here. Related Posts: Half Square Triangles Layer Cake Cuts Basic Quilt Sizes Creating Charm Squares

In quilting, the thickness of the thread will change how your quilt reads to the eye. Angela Huffman explains how thread weights will change your quilting.

Halloween is looking to be different this year, but that's a great excuse to create some Halloween decorations for your home. Here are the best bat sewing patterns, from spooky-scary to spooky-cute (okay, mostly cute!): The Bat soft toy wall hanging from EFI Little Things could be used as a snuggly baby toy

These beautiful examples of Hawaiian quilting are from the Polynesian Cultural Center on Oahu. Back in college, I made a pillow using this applique technique for a "GEOLOGY of Hawaii" class. For a geology class??? I know. Makes no sense. It was the 70s, what can I say... I don't know what became of my yellow orange/orange pillow that had nothing to do lava, volcanoes, or island formation.

This week we were using acrylic paint on fabric to create different effects. We started by stippling some calico with a dry brush using 2 colours - blue and yellow in my case, resulting in lots of green and looking like a flowery meadow! Then we moved on to using a diffuser and thin paint to give an effect like airbrushing, holding a piece of ripped paper in front of the fabric to act as a mask so that some parts stayed white. Then we moved on to a way of making monoprints on glass. We put blobs of paint on a sheet of glass. Some of the paint was special acrylic interference paint that produces a shimmery effect when printed. We then put another sheet of glass in top and pressed hard and twisted the glass to get the paint to mix at the edges. When the sheets of glass are prised apart, you get feathery patterns in the paint. We places pieces of fabric on, pressed lightly and printed off the image. These are some of the prints I made from 2 different attempts. As with all these things, it is the choice of colours that is most important for a pleasing result. The paint dries quite quickly but it can be easily scrubbed off the glass to do further prints. I then chose one of my prints to quilt. I made a sandwich with the printed fabric, cotton wadding and calico. Then I sewed round the edge of the feathery edges using free-machining to produce the quilted effect. It took a long time to do all the 'fingers' of paint but the final piece is very appealing. Next we had to choose another print and try out a quilting technique called Trapunto. Here you have the printed fabric and a backing fabric and outline your shapes. I chose a more 'blobby' print and outlined the islands of colour using free-machining again. Then you stuff selected blobs from the back with wadding. This shows part of the back of it. You cut a slit with sharp scissors, poke the wadding in with a bodkin and then sew the slit back up with herringbone stitch. I don't know if I have over-stuffed mine as the final piece is now quite wrinkled. Another learning point is not to use this kind of furnishing fabric as a backing fabric again as it seemed very hard to sew using free-machining - the needle seemed to get caught in the jacquard pattern. I have been working on my manipulated calico sampler this week too. Once I had decided what size to go for (about 32cm square) and laid out the pieces I had already made I didn't have that much more to do. I have still got to mount it onto card, which is why the corners are still hanging out. The end result is going to be quite impressive. The techniques used are (clockwise from top left): Furrowing (see post from Week 13) Pleating Stuffed pyramid Fabric strips folded alternately like a paper jack-in-a-box spring Frayed edge strips gathered and sewn in rows Selvedge strip gathered to form a rose Random tucks sewn horizontally and vertically Stuffed sausage shape decorated with a strip of gathered frayed fabric Frayed strip gathered to form a rose Circle gathered round a piece of card and topped with another one and a frayed gathered strip Various circles gathered and stuffed, the large one quilted through in places Thin strips pulled through a square of Binca fabric (in centre of sausage circle) Thick wool wrapped in calico Strips of folded fabric woven Raw edge circles gathered and pulled up, large one round card and small one stuffed Fabric gathered by hand in both directions, ruched up and sewn down round the edge only Fabric gathered round chick peas 2 circles gathered up round card, one with snipped edge and one with turned edge Various fabric 'nipples' made by sewing a running stitch in a spiral and pulling up Evenly spaced tucks pressed and then sewn across at right-angles in alternate directions Today is it my daughter's 16th birthday so I wanted to make her a special card. I chose co-ordinating papers and decorated them in various ways, dragging the edges across a black ink pad to give a vintage look. I was very pleased to find a sheet of paper featuring a rabbit that looks similar to hers, except for the colour! I also made a Valentine's Day card for my husband using a square of red heart plastic bag behind a silver Angelina fibre heart, topped off with a red heart cut from a Quality Street wrapper! The hearts are suspended across the window on very thin wire wrapped round tiny red brads. It looked really good for not much effort and lots of recycling!

Stay healthy and pain free with these 5 tips for good sewing ergonomics, including advice for different stages of quilting!
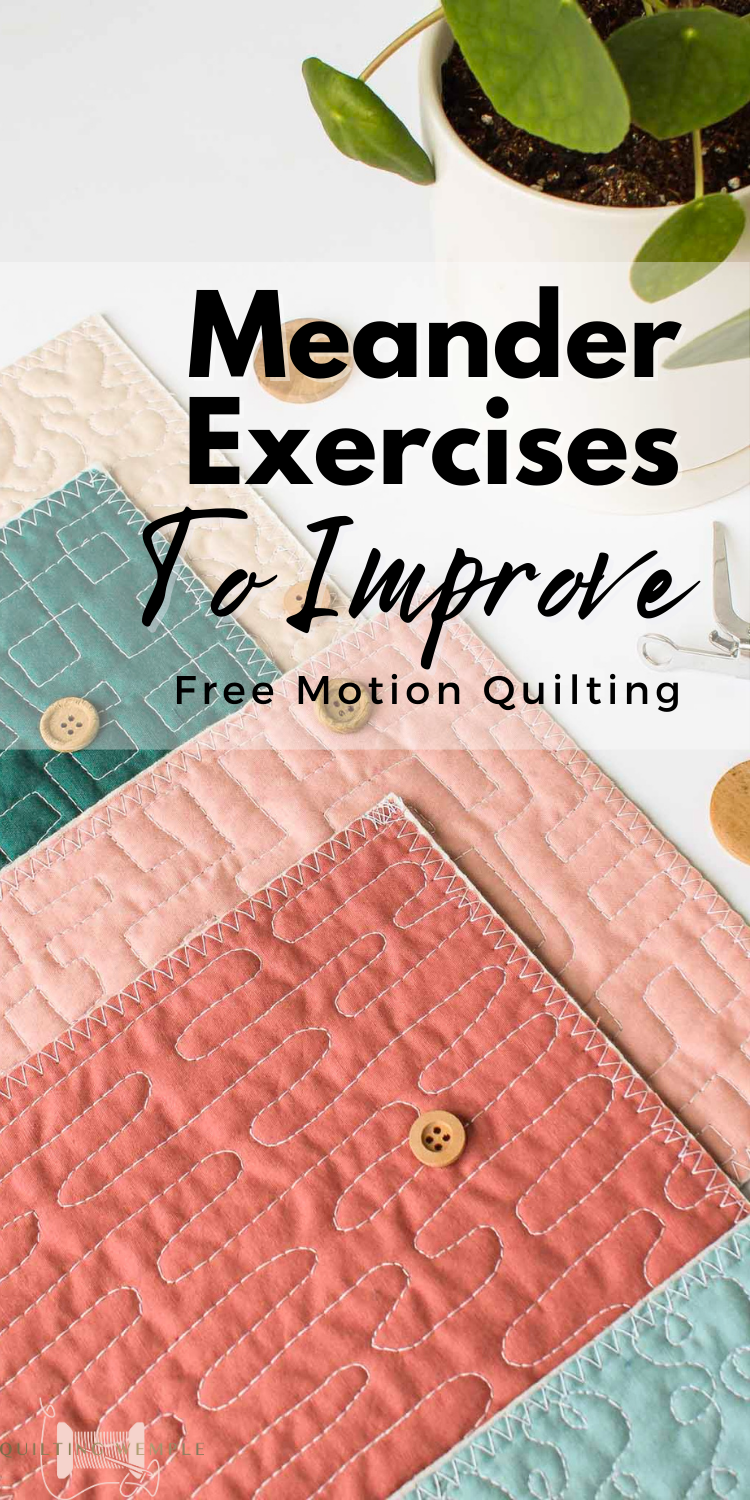
Continue reading for 5 meander practice exercises that will help you learn to put FMQ skills on autopilot so you can focus more on quilting.
