

Introduction to Tambour Hand Embroidery: A Step-by-Step Guide Have you ever seen an intricate design elegantly embroidered onto fabric and wondered how it was done? The art of hand embroider…

Learn a jeans knee repair technique to fix any knee holes in your jeans.

If you’re ever curious about stumpwork embroidery, but don’t know where to start, we’ve got just the tutorial for you! Our easy-to-follow instructions will have you stitching away like a pro…

Узнайте в статье какие нитки нужны для ковровой техники и как подобрать пряжу ? Инструкции по ковровой вышивке для начинающих и не только.

Sashiko—often translated as “little stabs.” Sashiko is a type of sewing or embroidery. Sashiko is a Japanese traditional art that dates back to the Edo era. Historically, sashiko was wi…

Friday Slipover V-neck - Knitting Pattern Designed by PetiteKnit This pattern is a printed pattern in English. Friday Slipover V-neck is worked from the top down in broken rib. First the back of the yoke is worked, then the shoulders, then the front of the yoke and finally the body. Rib edges are worked along the V-neck and along the armholes. The neck edge is worked with decorative decreases mid front. Knit a swatch before beginning the project to check if the recommended needle size gives you the correct gauge. Note, that broken rib stretches when washed and with wear. The gauge you can expect to have before wash/wear is approx. 24-25 sts pr. 10 cm [4 inches], which after wash/wear will grow to the correct gauge of 22 sts pr. 10 cm [4 inches]. The most important element in achieving the correct shoulder width and fit is knitting at the correct gauge, so be sure to wash your swatch before measuring the gauge. Size guide Friday Slipover V-neck is designed to have approx. 6 cm [2¼ inches] of positive ease, meaning it is designed to be 6 cm [2¼ inches] larger in circumference than your chest measurement. The sizes XS (S) M (L) XL (2XL) 3XL (4XL) 5XL are designed to fit a chest circumference of 80-85 (85-90) 90-95 (95-100) 100-110 (110-120) 120-130 (130-140) 140-50 cm [31½-33½ (33½-35½) 35½-37½ (37½-39½) 39½-43¼ (43¼-47¼) 47¼-51¼ (51¼-55) 55-59 inches]. Before beginning your project, measure yourself with a measuring tape around your bust to determine which size will fit you the best. For example, if you measure 90 cm [35½ inches] around your bust (or the widest place on your body) you should knit a size S. A size S sweater has a chest circumference of 96 cm [37¾ inches]. Sizes: XS (S) M (L) XL (2XL) 3XL (4XL) 5XL Measurements: Bust circumference: 91 (96) 100 (105) 115 (125) 135 (145) 155 cm [35¾ (37¾) 39¼ (41¼) 45¼ (49¼) 53¼ (57) 61 inches] Back width incl. rib edges: 36 (36) 37 (40) 42 (42.5) 43.5 (43.5) 45.5 cm [14¼ (14¼) 14½ (15¾) 16½ (16¾) 17¼ (17¼) 18 inches] Armhole depth: 24 (24) 26 (28) 28 (30) 31 (31) 31 cm [9½ (9½) 10¼ (11) 11 (11¾) 12¼ (12¼) 12¼ inches] Total length: 53 (55) 56 (58) 60 (61) 63 (65) 66 cm [20¾ (21½) 22 (22¾) 23½ (24) 24¾ (25½) 26 inches] measured mid back incl. neck edge Gauge: 22 sts x 34 rows in broken rib on 4 mm [US6] needles = 10 x 10 cm [4 x 4 inches] after wash and blocking Needles: Circular needles: 4 mm [US6], 60 and 80 or 100 cm [24 and 32 or 40 inches] and 3.5 mm [US4], 40 and 80 or 100 cm [16 and 32 or 40 inches] Materials: 150 (150) 150 (150) 200 (200) 200 (200-250) 250 g Sunday by Sandnes Garn (50 g = 235 m [257 yds]) held together with 75 (75) 75 (75) 100 (100) 100 (125) 125-150 g Brushed Lace from Mohair By Canard (25 g = 212 m [232 yds]) or Tynn Silk Mohair by Sandnes Garn (25 g = 212 m [232 yds]) or Silk Mohair by Isager Yarn (25 g = 212 m [232 yds])

Chris of Ella’s Craft Creations shares an excellent method for transferring an embroidery design to fabric. In her needlework tutorial, she will show you one of the easiest ways to …

Use this free crochet pattern to make a bunny bonnet will hop off your hook in no time! Check out the FREE extra small (newborn) pattern here. The pattern in 5 sizes is available for purchase. This bonnet is perfect for Spring and Easter and makes a great photo prop.

These life hacks will make your daily to-dos (plus a few random projects) so much easier! Check out what you've been missing.

An automatic needle threader makes it easy to thread the eye of your needle without licking the end of your thread or pulling out a magnifying glass. It only takes a few seconds to thread your sewi…

Learn how to start and end embroidery stitches with this easy to follow tutorial featuring three simple methods.

I am short. There is no other way to put it. I’m barely 5′ tall. I think I’ve only bought two pairs of used jeans in my life that were already hemmed to my length…ever……

Ashley Briggs works with you and provides helpful techniques for threading a sewing needle with chapstick.
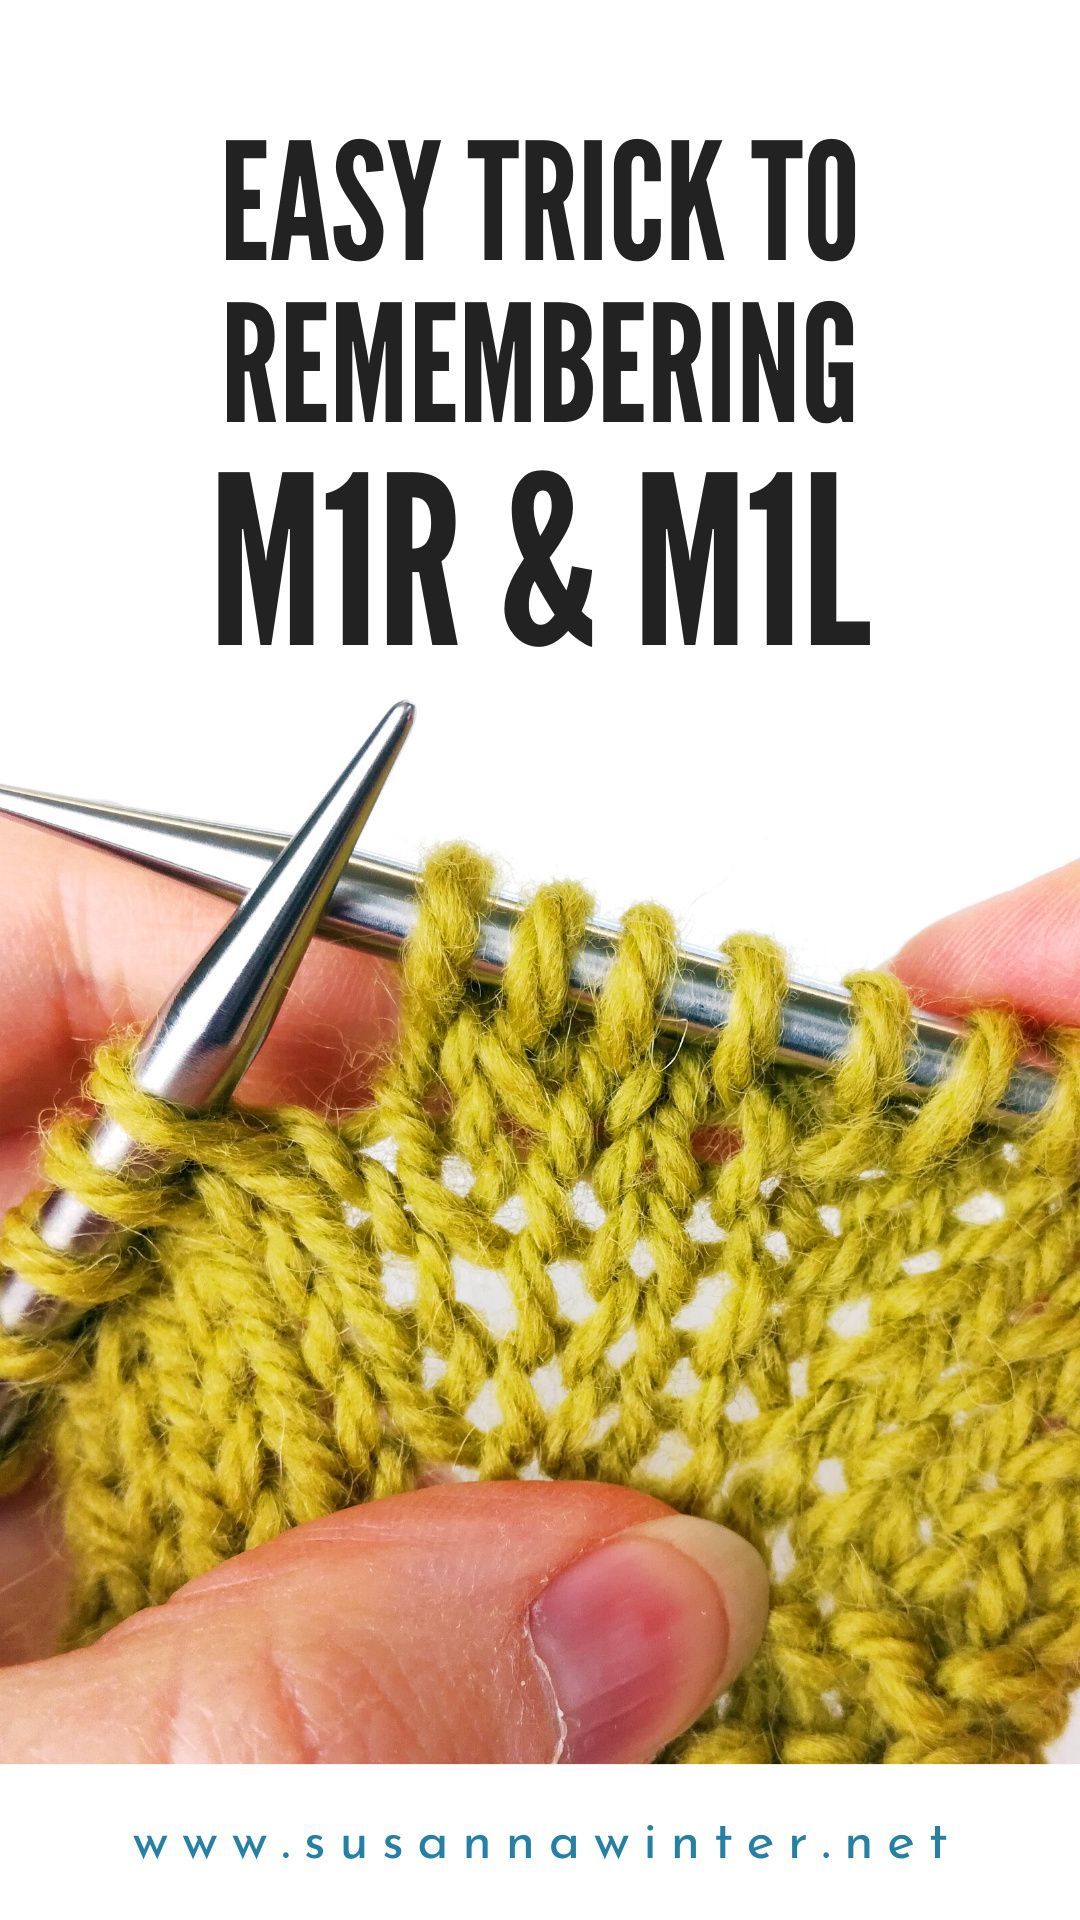
In this post I present an easy way to remembering M1R and M1L increases. The trick is to always pick up the strand from back to front with the needle that points in the direction you want the increase to lean into. I also propose handedness-neutral terms for M1 increases.

In this post, I continue my series of articles about working with 100% silk fabric. Now I would like to talk about different types of stitches and seams appropriate for natural silk fabric. I know that basting and pinning are not among the very popular sewing techniques, but for many types of silk fabric, it makes perfect sense to baste and pin. The last thing you want is to screw up a 50 dollars a yard piece of silk trying to make something nice out of it faster. I am talking now about all kinds of basting: basting pattern pieces, basting hems, pleats, gathers, set-in sleeves, positioning pockets, etc. Basting is also very important for a first fitting.

The easiest way to repair a pinhole prick in your favorite T-Shirt doesn't need needle, thread or sewing at all— just this quick trick that works like magic.

In this tutorial I’m going to show you how I added a zipper placket to this Frankenbag. A couple of months ago I promised that I’d make a tutorial for adding a placket to this bag. I…

Whether you do hand embroidery or machine embroidery, you will run into one of those situations where someone thinks you can work miracles. In Eileen’s case, it was being asked to embroider h…

There are so many different types of embroidery needles out there. When it comes time to select them, it can be confusing. This quick and concise guide goes over the basics so you can...

Quick and easy way to join the new yarn in crochet. No need to use a needle to weave in yarn ends. Showing how to do it using double crochets but works...

All of these car-themed machine embroidery patterns were free at the time of writing this article. Each pattern is designed to be easy to follow, making them perfect for beginner embroiderers. With…

Thinking about trying punch needle? Save yourself some frustration with these tips you NEED before you try it! + Free Printable Patterns! Get started off right!

There are many tutorials out there on how to create a narrow hem. The problem is they mostly demonstrate on a rectangular piece of fabric, which makes the process deceivingly easy. With a few exceptions, that usually is not how I use a narrow hem. If I need to hem something straight, a wide hem of 1″ or […]

When it comes to knitting mechanics, there’s a few different ways that knitters will hold the yarn and needles to make their stitches. Every knitter finds a style that works for them. In this video, Jill Wright breaks down how to knit using the Scottish method of knitting. She demonstrates how to tension the yarn,…

When you’re working with lightweight fabrics, a French seam is often the finish of choice. But if there’s a side-seam vent, you need a way to neatly end the seam…

Learn how to Grading Altering Sewing Pattern Sizes. Modify your patterns to use the sizes that fit your body with this easy tutorial.

An simple sewing hack to alter a t-shirt neckline if it’s too tight

In this tutorial, we'll turn your favorite t-shirt pattern into a cute swing tee for summer!
