

Have some easy fun with kids using this free printable soccer cootie catcher! Great for your favorite soccer player, team, classroom, family, & homeschool.

Learn how to make a bouncy ball using 3 simple ingredients! These DIY bouncy balls are SO COOL! It's such a great craft that also doubles as a science experiment! Kids and adults can make a homemade bouncy ball toy in just a few minutes. They're so easy to make and a whole lot of fun to play with! This post contains affiliate links. If you use these links to buy something we may earn a small commission which helps us run this website. How to Make a Bouncy Ball Learn how to make a bouncy ball in less than

Are you looking for a fun way to teach describing characters and character traits? Try this! Fold each side of a horizontal sheet of paper to the middle. Have the kids draw a picture of the character on the front. Put words to describe the outward appearance of the character on the outside. This can be things that are obvious from the text. Next, open the page up and write character traits and words to describe the character's emotions on the inside. These are things you have to infer about the character's traits based on the evidence from the text. It's pretty fun and these make a great display!

These editable name tracing printable worksheets make learning to write names so much fun! You only need to type in each students' name once and print!

This butterfly craft is so fun and it's super easy to make! Kids of all ages will love watching the paper butterfly flap its wings just like a real butterfly. The mechanics of the moving wings also add a fun lesson in engineering, making it a great STEAM project. Butterfly Craft We used drinking straws to create the moving wings of our butterflies. It's SO COOL how the butterfly flaps its wings. It really looks like it's flying! This butterfly craft is the perfect activity to go along with a butterfly or insect lesson at school. It's also a great spring

Colorful & Fun FREE Printables for Toddlers to Learn From

Have some easy fun with kids using this free printable soccer cootie catcher! Great for your favorite soccer player, team, classroom, family, & homeschool.

Fuel your creative fire with these 26 sizzling Charizard coloring pages that are all free to download and print! These sheets are perfect for those who wish to dive into the thrilling world of Pokemon, featuring the immensely popular and striking fire-breathing dragon, Charizard!

Looking for some fun roll and cover games for preschool and kindergarten? Grab this free set of seasonal games!

FUN End of the Year Art Projects- It's the end of the year-go out having FUN! I know how it goes at the end of the year-your tired, the kids are tired...EVERYONE is ready for summer break! Go out with a bang with these super fun end of the year art projects!

Download this Free Vector about Saguaro cactus plant on white background, and discover more than 125 Million Professional Graphic Resources on Freepik. #freepik #vector #desertcactus #clipart #cartoondesert

Tanti labirinti dedicati alle lettere dell'alfabeto in PDF da stampare per bambini; ogni lettera (maiuscola o minuscola) con un labirinto al suo interno

Kids will love decorating a paper craft that looks just like them, with this FREE All About Me Craft Template! Includes 4 templates and clothes!

World Flag garland kid's craft that is easy to make, sparks conversations about different countries, and is a perfect craft for the Olympics!

Soccer is one of the most popular sports in the world, and it’s easy to see why! There are amazing skills and tricky moves on show with the thrill of seeing a

The Fall Preschool Unit is packed full of hands on math & literacy activities as well as no prep worksheets for easy lesson planning.

I love Gyarados! He's definitely one of my favorite Pokemon (I have a thing for water Pokemon). I really wanted to make a cute little Gyarados crochet pattern, most of the ones I could find were not exactly what I had in mind. So I set out to make my own pattern! But as I went, I realized I had misjudged the size - a lot. I kept going, though. I was really pleased with how he was shaping up, and that's how we ended up with the 40" long Gyarados wonder! I would like to say this pattern is advanced. Also, this post is very picture heavy. You'll need to know double crochet, slip stitch, increase, decrease, front loop only stitching, and triple crochet. You'll also need to know how to crochet in rounds, rows and magic circles. Personally, I wired my Gyarados so he could be posed and placed in different positions. I also needle felted his eyes, but you can easily do felt shapes and glue them on, or sew them on if you prefer. This pattern takes me about three full days of crochet and binge watching Netflix! You can make a regular Gyarados using blue yarn, or make a shiny Gyarados by using red instead! I made one of each, so the photos with the instructions may vary in color. Crochet Terms MR- Magic Ring SC - Single crochet INC - Increase DEC - Decrease DC - Double Crochet TC - Triple Crochet F/O - Finish off DC INC - Increase with double crochet TC INC - Increase with triple crochets SL ST - Slip Stitch FLO - Front loops only Number in "( )" at the end of each line is the total number of stitches that should be on that row Directions in "**" followed by a "x #" should be repeated the number of times indicated. For example : *SC, INC* x 6 (18) = SC, INC, SC, INC, SC, INC, SC, INC, SC, INC, SC, INC = 18 Materials Needed White, lemon, pink, dark teal and blue yarn, worsted weight (substitute red yarn instead of blue, and dark maroon instead of dark teal for a shiny Gyarados) *I use red heart Super Saver brand yarn 3 mm crochet hook yarn needle scissors Needle felting supplies or felt for the eyes, in red, black and white (substitute orange instead of red for shiny) Optional: Clothesline wire, or other wire or any joints you prefer to use in your amigurumi Large Gyarados Pattern Head - in blue (or red for shiny) MR 6 INC in each stitch round (12) *SC, INC* x 6 (18) *2 SC, INC* x 6 (24) *3 SC, INC* x 6 (30) *4 SC, INC* x 6 (36) *5 SC, INC* x 6 (42) *6 SC, INC* x 6 (48) *7 SC, INC* x 6 (54) *8 SC, INC* x 6 (60) *9 SC, INC* x 6 (66) *10 SC, INC* x 6 (72) 36 SC FLO, turn (36) 108 SC - when you reach the beginning of the last row simply continue around. You'll end up with a slope in your round. Do the same thing every time this happens and just continue in the rounds over uneven stitches to create a round. Turn. *5 SC, DEC* x 6 (30) 66 SC (66) 66 SC (66) *SC 9, DEC* x 6 (60) 60 SC (60) *3 SC, INC* x 3, *9 SC, DEC* x 3 (60) 60 SC (60) *3 SC, DEC* x 6, 29 SC, SL ST (54) Turn 17 SC, SL ST (18) Turn 54 SC (54) *7 SC, DEC* x 6 (48) *7 SC, DEC* x 3, *6 SC, INC* x 3 (48) *7 SC, DEC* x 3, *6 SC, INC* x 3 (48) *7 SC, DEC* x 3, *6 SC, INC* x 3 (48) *7 SC, DEC* x 3, *6 SC, INC* x 3 (48) *6 SC, DEC* x 6 (42) 4 SC, 3 DC, 2 SC, 3 DC, 4 SC (16) turn 4 SC, 3 DC, 2 SC, 3 DC, 28 SC (40) 4 SC, DEC over the 3 DC, 2 SC, DEC over the 3 DC, 10 SC, 14 DC, 5 SC, SL ST (41) turn 6 SL ST, 14 DC (20) turn SC 14 (14) turn SC 14 (14) turn SC 14 (14) turn SC 14 (14) turn SC 14 (14) turn SC 14 (14) turn SC 14 (14) F/O Facial Spike A - Make two in blue (red for shiny) MR 4 (4) 4 SC (4) 4 SC (4) *INC, SC* x 2 (6) *INC, 2 SC* x 2 (8) *3 SC, INC* x 2 (10) 10 SC (10) F/O leaving a tail for sewing later. Facial Spike B - Make two in blue (red for shiny) MR 5 (5) INC, 4 SC (6) *INC, 2 SC* x 2 (8) 8 SC (8) *INC, 3 SC* x 2 (10) F/O leaving a tail for sewing later. Facial Spike C - Make two in blue (red for shiny) MR 5 (5) INC, 4 SC (6) *INC, 2 SC* x 2 (8) *INC, 3 SC* x 2 (10) *INC, 4 SC* x 2 (12) F/O leaving a tail for sewing later. Whiskers - Make two in blue (red for shiny) MR 3 - 31. SC 3 (90 SC in rounds) F/O leaving a tail for sewing later Mouth - in black - work in ROWS Chain 14, turn 14 SC (14) 14 SC (14) 14 SC (14) 14 SC (14) 14 SC (14) 14 SC (14) 14 SC (14) 14 SC (14) FLO 14 SC (14) 14 SC (14) 14 SC (14) 14 SC (14) 14 SC (14) 14 SC (14) 14 SC (14) F/O Tongue - in pink MR 6 (6) INC in each stitch round (12) *SC, INC* x 6 (18) *2 SC, INC* x 6 (24) 24 SC (24) 24 SC (24) 24 SC (24) 24 SC (24) 24 SC (24) 24 SC (24) F/O leaving a tail for sewing later Lips - in lemon 5 SC, join last CH to first CH to make a circle of 5 CH (5) - work in rounds now, forming a tube - 71. 5 SC (5) - this equals 350 SC in rounds F/O - Sew the ends together to create a circle. Middle Facial Spike (Center) - in dark teal (maroon for shiny) Stuff as you go! MR 6 (6) *INC, SC* x 3 (9) *INC, 2 SC* x 3 (12) 12 SC (12) 12 SC (12) 12 SC (12) *4 SC, DEC* x 2 (10) 10 SC (10) 10 SC (10) 10 SC (10) 10 SC (10) 10 SC (10) *DEC, 3 SC* x 2 (8) 8 SC (8) 8 SC (8) 8 SC (8) *DEC, 2 SC* x 2 (6) 6 SC (6) 6 SC (6) 6 SC (6) 6 SC (6) 6 SC (6) *DEC, SC* x 2 (4) 4 SC (4) 4 SC (4) 4 SC (4) 4 SC (4) 4 SC (4) 4 SC (4) DEC, DEC (2) F/O Middle Facial Spike (Sides) - make two in dark teal (maroon for shiny) MR 4 (4) 4 SC (4) 4 SC (4) 4 SC (4) *INC, SC* x 2 (6) 6 SC (6) 6 SC (6) 6 SC (6) *INC, 2 SC* x 2 (8) 8 SC (8) 8 SC (8) 8 SC (8) 8 SC (8) 8 SC (8) *INC, 3 SC* x 2 (10) 10 SC (10) 10 SC (10) 5 SC (5) turn SC, DEC, 2 SC (4) turn DEC, DEC (2) F/O, leaving a tail for sewing later Stuff and then sew the two side spikes on opposite sides of the larger end of the middle spike. Teeth - in white - make four and work in ROWS CH 4, turn 3 SC, first SC in 2nd CH from hook (3) 3 SC (3) DEC, SC (2) DEC (1) F/O . Fold each tooth in half, whip stitch up the side. Side Head Fin - begin in blue (red for shiny) - make two MR 3 (3) 3 SC (3) 3 SC (3) 3 SC (3) 3 SC (3) 3 SC (3) 3 SC (3) 3 SC (3) 3 SC (3) 3 SC (3) Keep connected to the skein of yarn. Begin separately in white , work in ROWS for this section CH 11, turn 9 DC, First DC in 3rd CH from hook counts as first DC (9) turn *2 DC, INC* x 3 (12) *3 DC, INC* x 3 (15) *4 DC, INC* x 3 (18) DC INC, 3 DC, 3 SC, 2 DC, DC INC, 2 DC, 2 SC, DC, DC INC, 2 DC (21) turn CH 3 (counts as first TC), 2 TC, 2 DC, SC, 2 SL ST, 2 DC, INC TC, 2 DC, 2 SL ST, 3 DC, 3 TC (22) F/O Take the red piece of the fin and continue SC up the top of the white piece of the fin. Whip stitch the rest of the red piece down the side of the white to complete the fin. Assembling the head: Stuff the main part of the head. Whip stitch the mouth to the head, with the longer part of the mouth facing downward. Sew the tongue into the mouth on the fold, making sure not to go through to the underside of the jaw. Next, sew the lips to the mouth. Take two teeth and sew them to the top of the mouth on opposite sides. Do not sew all the way through the lips. Next, take side spikes A, B, and C. They will be sewn to each side of the head. Spike A will be the top spike, B in the middle, and C closest to the mouth, as shown below. Next, sew the eyebrow spike to the center of the face, just above the nose. Once this is in place, you can needle felt the eyes or use felt to glue or sew the eyes in place. Use red for a regular gyarados' eyes, or use orange for a shiny gyarados. I have seen both red and orange used for a shiny gyarados' eyes. Flip the head over and sew the fins behind the side head spikes. Next, you will have to cut a length of clothesline wire the length of both whiskers plus the jaw. Slip the wire into one of the whisker "tubes", and then through the jaw underneath the fins. Slip the other whisker onto the other side of the wire. Whip stitch the ends of the whiskers to the jaw to keep them in place, and bend the wire into "S" shapes. The head is complete! The body: Underbelly and back- Complete the underbelly in yellow, and the back in red or blue based on shiny or regular gyarados. CH 5 and turn First SC in second CH from hook, 4 SC (4) *INC, SC* x 2 (6) *INC, SC* x 3 (9) 9 SC (9) 9 SC (9) 9 SC (9) *SC, DEC* x 3 (6) *INC, SC* x 3 (9) *2 SC, INC* x 3 (12) 12 SC (12) 12 SC (12) 12 SC (12) 12 SC (12) *2 SC, DEC* x 3 (9) *SC, DEC* x 3 (6) *SC, INC* x 3 (9) *2 SC, INC* x3 (12) 12 SC (12) 12 SC (12) 12 SC (12) 12 SC (12) *2 SC, DEC* x 3 (9) *SC, DEC* x 3 (6) *SC, INC* x 3 (9) *2 SC, INC* x 3 (12) *3 SC, INC* x 3 (15) 15 SC (15) 15 SC (15) 15 SC (15) 15 SC (15) 15 SC (15) 15 SC (15) *3 SC, DEC* x 3 (12) *3 SC, INC* x 3 (15) *4 SC, INC* x 3 (18) 18 SC (18) 18 SC (18) 18 SC (18) 18 SC (18) 18 SC (18) 18 SC (18) 18 SC (18) 18 SC (18) *4 SC, DEC* x 3 (15) *3 SC, DEC* x 3 (12) - Repeat lines 35 - 46 *3 SC, INC* x 3 (15) *4 SC, INC* x 3 (18) 18 SC (18) 18 SC (18) 18 SC (18) 18 SC (18) 18 SC (18) 18 SC (18) 18 SC (18) 18 SC (18) *4 SC, DEC* x 3 (15) *4 SC, INC* x 3 (18) *5 SC, INC* x 3 (21) 21 SC (21) 21 SC (21) 21 SC (21) 21 SC (21) 21 SC (21) 21 SC (21) 21 SC (21) 21 SC (21) 21 SC (21) 21 SC (21) *5 SC, DEC* x 3 (18) *4 SC, DEC* x 3 (15) - Repeat lines 58-71 four more times *4 SC, INC* x 3 (18) *5 SC, INC* x 3 (21) 21 SC (21) 21 SC (21) 21 SC (21) 21 SC (21) 21 SC (21) 21 SC (21) 21 SC (21) 21 SC (21) 21 SC (21) 21 SC (21) *5 SC, DEC* x 3 (18) F/O for the underbelly. Continue for the back. 18 SC (18) *5 SC, INC* x 3 (21) *6 SC, INC* x 3 (24) *7 SC, INC* x 3 (27) *8 SC, INC* x 3 (30) *9 SC, INC* x 3 (33) *10 SC, INC* x 3 (36) *11 SC, INC* x 3 (39) *12 SC, INC* x 3 (42) *13 SC, INC* x 3 (45) *14 SC, INC* x 3 (48) *15 SC, INC* x 3 (51) 15 SC, DC INC, 8 DC, TC INC, TC, 7 DC, DC INC, 16 SC (54) 17 SC, DC INC, 2 DC, 6 TC, TC INC, 7 TC, 2 DC, DC INC, 17 SC (57) F/O Tail Fin Middle - in blue (red for shiny). Stuff as you go! MR 6 *INC* x 6 (6) *INC, SC* x 6 (18) 18 SC (18) 18 SC (18) *DEC, SC* x 6 (12) 12 SC (12) 12 SC (12) 12 SC (12) 12 SC (12) *DEC, 4 SC* x 2 (10) 10 SC (10) 10 SC (10) *DEC, 3 SC* x 2 (8) 8 SC (8) 8 SC (8) 8 SC (8) *DEC, 2 SC* x 2 (6) 6 SC (6) 6 SC (6) *DEC, SC* x 2 (4) 4 SC (4) *DEC* x 2 (2) F/O Tail Fin Sides - in white, make two CH 2, turn SC (1) INC (2) *INC* x 2 (4) *INC, SC* x 2 (6) 6 SC (6) *INC, 2 SC* x2 (8) 8 SC (8) *INC, 4 SC* x 2 (10) 10 SC (10) 10 SC (10) *INC, 4 SC* x 2 (12) 12 SC (12) 12 SC (12) *INC, 5 SC* x 2 (14) 14 SC (14) 14 SC (14) 14 SC (14) 14 SC (14) 14 SC (14) SC, 2 DC, TC, DC, SC, 2 TC, SC, DC, 2 TC, DC, SC (14) SC, DC, 2 TC, DC, SC, 2 TC, SC, DC, 2 TC, DC, SC (14) F/O SC in red up a side of a white tail fin piece (as shown below). You will then attach it to the larger part of the middle piece and SC 3-4 stitches to the other side. Then SC down the side of the other fin. Then whip stitch the fins to the center piece to create one tail. Back Spots A - Make 8 in yellow CH 5 turn 4 SC (first SC in 2nd CH from hook) (4) 4 SC (4) 4 SC (4) SC, 2 DC, SC (4) F/O Back Spots B - Make 8 in yellow CH 4 turn 3 SC (first SC in second CH from hook) (3) 3 SC (3) 3 SC (3) SC, DC, SC (3) F/O Back Spots C- Make 8 in yellow CH 4, turn SC 3 (first SC in second CH from hook) (3) F/O Back Fin 1 Part 1- Make four in white MR 3 3 SC (3) 3 SC (3) INC, SC (4) *INC, SC* x 2 (6) *2 SC, INC* x 2 (8) F/O Back Fin 1 Part 2 - Make two in white MR 4 4 SC (4) INC, 3 SC (5) INC, 4 SC (6) 6 SC (6) 6 SC (6) *INC, 2 SC* x 2 (8) 8 SC (8) 8 SC (8) *INC, 3 SC* x 2 (10) 10 SC (10) 10 SC (10) 10 SC (10) Join two spike 1 and one spike 2 together by SC around 26, with the tallest spike in the middle. (26) DEC, 7 SC, DEC, 3 SC, DEC, 6 SC, DEC, 3 SC (22) 22 SC (22) 22 SC (22) 3 SC, INC, 9 SC, INC, 8 SC (24) F/O Take the other two spike part 1's and the other spike part 2 and repeat steps 14-18. You should end up with two three grouped spikes that are identical. Back Fin 2 - in white MR 4 4 SC (4) 4 SC (4) *INC, SC* x 2 (6) 6 SC (6) F/O Begin another spike separately MR 4 *INC, SC* x 2 (6) *INC, 2 SC* x 2 (8) 8 SC (8) Join the first spike with this one by SC 14 (14) *DEC, 5 SC* x 2 (12) 12 SC (12) *2 SC, INC* x 4 (16) *7 SC, INC* x 2 (18) 18 SC (18) *INC,8 SC* x 2 (20) 20 SC (20) SC to the corner of the taller spike (about 12 SC) F/O Begin another spike separately MR 3 INC, 2 SC (4) INC, 3 SC (5) INC, 4 SC (6) 6 SC (6) 6 SC (6) *INC, 2 SC* x 2 (8) *INC, 3 SC* x 2 (10) Join to the main spikes with SC 30 around (30) 30 SC (30) DEC, 8 SC, DEC, 18 SC (28) SC around to opposite corner (about SC 8) F/O Begin another spike separately MR 3 3 SC (3) INC, 2 SC (4) 4 SC (4) *INC, SC* x 2 (6) Join spikes with 34 SC (34) DEC, 5 SC, DEC, 25 SC (32) 32 SC (32) F/O Back Fin 3- in white MR 3 3 SC (3) 3 SC (3) INC, 2 SC (4) 4 SC (4) 4 SC (4) F/O Begin a new spike separately. Make two. MR 4 4 SC (4) *INC, SC* x 2 (6) F/O Join one of the smaller spikes to the first larger spike with 10 SC (10) DEC, 6 SC, join the second smaller spike beside the smaller spike with 15 SC (15) 15 SC (15) F/O Assembling the body: Begin with the back piece. You will be sewing all of the back spots to the back piece. Begin at the tail. There will be two spots on each bump of the body. Place the spots at the decrease of each bump right before the next. Use the photos for placement help if you need it! You will place the spots about one stitch away from the edge. The smallest ones, back spots C, will be placed on the first four bumps of the body. The next four bumps will have back spots B, and the four bumps after that will have back spots A. Place the belly and back together with edge matching up starting at the tail. Whip stitch up one edge. Next, you'll need to cut a piece of clothesline wire twice the length of the body, and twist the two ends together to form an oval. Place this inside of the body, and finish whip stitching up the other side of the body, stuffing around the wire as you go! This will allow you to pose the body in those great gyarados waves! Once the body is stuffed, you can whip stitch the tail fin to the tail of the body. Now focus on the nape of the neck. You'll fold back the extra portion of the back towards the rest of the body, and then tuck in each side where the flap angles downward. Use the photo above to help with shaping! Now take spike one of the Spike 1's you made and sew it in the very middle of the folded back portion of the body. This is the spike that goes directly behind gyarados's head. At this point you can also tack down with matching yarn the folds in the flaps. I usually use two points on each flap for tacking it down. You can now sew on the rest of the spikes to the body! The second spike 1 will go on the second bump from the head, directly behind the spike you just sewed on. Spike 2 will go on the fifth bump from the head, and spike 3 will go on the third bump from the tail tip. All you have to do now is sew his head onto his body! And congratulations! After days (weeks, months) of toiling and crocheting, you have your own amazing gyarados! I'd love to see pictures if anyone else completes him! I also tried my best to edit and be thorough, but if you find an error in this pattern please let me know!
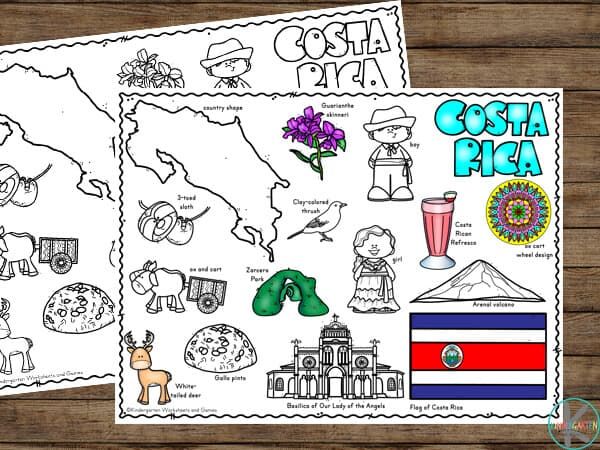
Learn about the lovely Central American country of Costa Rica; famous for coffee, bananas, ox and cart and more with printable Costa Rica Coloring Pages.

Product description Formula 1 typography in red Red Formula 1 sketch. Text print with "Formula 1" in red text next to the finish line, all on a light background. This text print is perfect for the Formula 1 fan! The bold color will make it a great centerpiece on a living room wall or in the bedroom space.18334-4

Click on the image to view the PDF. Print the PDF to use the worksheet. Pokemon Maze This is a bit of a maze adventure. Follow the directions to get Ash through the Pokemon maze. Collect all 6 Pokemon if you can. Suggested Grade Level Any More from Teaching Squared Teaching Squared offers a huge

Tanti labirinti dedicati alle lettere dell'alfabeto in PDF da stampare per bambini; ogni lettera (maiuscola o minuscola) con un labirinto al suo interno

Break your students of their "Dead Words" habit with this fun 3-page activity! Students practice finding better alternatives for overused words, like fun, nice, good, and said. These easy, print-and-go worksheets end with students applying their knowledge by creating a "Dead Word" tombstone (optiona...

Area and perimeter are two of my favorite math concepts to teach. It's easy to have fun learning area and perimeter.
