

https://www.youtube.com/live/34aNSOm4x4c?si=5Z6BepVxHaBlzw5k I’ll share some new products from the September-December Mini catalog. I'll also show you a fast and easy way to make several cards u

https://www.youtube.com/live/34aNSOm4x4c?si=5Z6BepVxHaBlzw5k I’ll share some new products from the September-December Mini catalog. I'll also show you a fast and easy way to make several cards u

Make your paper crafts awesome with these 10 Embossing Folder tips & tricks. Learn the proper embossing sandwich or plate + fun ideas.

In this Big Shot Tutorial: How to Use Embossing Folders, I’m going to show you how to use different types of embossing folders with your Big Shot so you'll know how to make your Big Shot sandwich for each type of folder for great results every time.

Card tutorials, craft tips, and Stampin' Up products

How to cut paper for the inside of your handmade cards. White inserts are great for dark color card bases.

Learn how to use your stamparatus to stamp your sentiment straight. Get beautiful cards each time with no paper waste with crooked images.

I'm sharing 7 ways a silicone craft sheet makes crafting so easy. The silicone sheet is a hidden gem and a must have paper craft tool for your craft room.

It's a lot easier to decoupage napkins to surfaces than you think! Learn how to do it with Mod Podge - tips, tricks, and a video included.

Tips for lining up paper and taping it onto your cards straight. Whether you're using strips of paper or lining up any elements in a row these tips will help.

Watercolor tips for beginner that will help you improve and paint better, as well learn a lot more new things about this painting medium.

Are you planning on creating LOTS of handmade cards? You'll need these 10 steps and tips for creating cards in bulk / batches to optimize your efficiency.

Welcome to my blog. Today I want to share a technique that is an oldie but goodie. The wax paper resist technique. It works amazing with distress inks. This tutorial will be featured on the Distress Ink Technique page on facebook. I am one of the admins and we take turns to post a tutorial on there every monday, the technique of the week :-) Well let me explain this particular technique. You will need an old iron to do this technique, or one you don't use for your fancy clothes ;-) This is what you need: an old iron, two pieces of card, a piece of wax paper and an embossing folder. Oh and an embossing machine obviously lol. I dry embossed the sheet of wax paper using an embossing folder and a piece of card to add more pressure. Here you see the pattern embossed in the wax paper. I cover the front and back with my pieces of card stock, and put this sandwich inbetween two sheets of cheap copy paper. You iron over the cheap copy paper to get the wax to melt onto the card stock. It goes very quickly. I put my iron on the highest setting and just move it over the sheets a few times. You can barely see it, but the wax print is on there! Trust me ha ha ha. See, I told you it was there. Here you see the difference between the embossed and the debossed side of the wax paper imprint. Left is the embossed side and on the right the debossed side. I inked over it with stormy sky distress ink and an ink blending tool. I turned them into two christmas cards with some embellishments and stamped sentiment. I stuck the card onto a card blank after I trimmed it to size and inked the edges with some walnut stain distress ink. I had this ATC laying around for ages, so I decided to use it as a card topper. Then stamped my sentiment in black and after that completely dried, I stamped it again but with embossing ink and heat embossed it in silver. On this card I stamped the sentiment in archival ink and after it dried I wrapped some baker's twine around the card stock befor I stuck it to the card blank. I added a little red jingle bell to give it a more festive look. I painted a wooden snowflake silver and adorned it to my card and it is done! Thank you so much for taking the time to have look and I hope you are going to give this technique a try :-) Have a great day, and keep your craft on ;-) Take care, Freddie Xox

Here are 12 top tips & tricks on how to use micron pens to help get your creative juices flowing!

Check out these easy an fun scrapbooking tips and tricks that will make your pages look amazing every time!

I love die-cutting, but I don’t love spending ages dotting glue on the back of my delicate die cut shapes! In this tutorial I'll show you how to use double sided adhesive Sticky Roll, to stick down your die cuts easily and mess free!

Here is a fun tried and true old fashioned card making technique. Long before we had all these sumptuous patterned papers we had gorgeous n...

Book folding is an artform that is just as fun as it sounds! With different techniques you can fold books to create artworks which will look terrific as decorations or as the perfect gift for friends. In this tutorial, crafter Dannielle from PreMadeReMade guides us through some of her best techniques and tips on how […]

In this blog I am sharing a tutorial on how to fold a paper shirt to use in your scrapbooking or card making. Please check out my video as well.

Learn how to emboss part of a card, plus learn how to make an easy Christmas thank you card with this simple and quick card tutorial.

Here are 12 top tips & tricks on how to use micron pens to help get your creative juices flowing!

Have you tried the Painter's Tape Technique yet? Chances are you may already have Painter's Tape at home and this is a quick, simple, no mess way to create a colourful background. If you
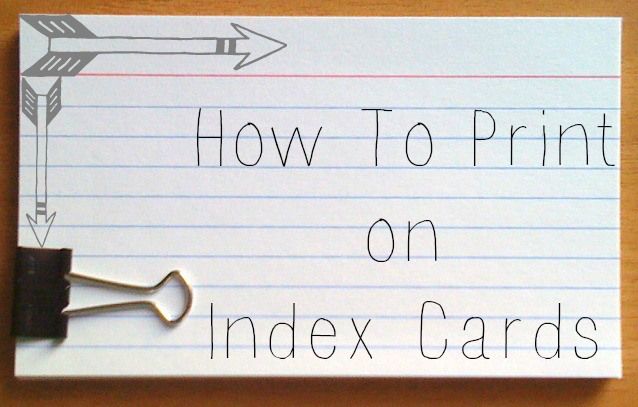
Did you know that you can print on your index cards? I don't know about you but I don't have the neatest handwriting and I tend to have more to write then I can manually fit onto one index card. If you have this problem too then this just might be your answer. I

In this lettering tutorial I am going to be talking about how to do calligraphy without a pen, and how you can learn to do calligraphy with pencil.

Card making, 10 must have tips for beginners.

Here are 12 top tips & tricks on how to use micron pens to help get your creative juices flowing!

In this post, I explain what watercolor wet-on-wet effects are, essential tips to have in mind, and explain how to do techniques like blooms, splatters and runs.
