

Sharing our board and batten bedroom wall & 12 other ideas! Tips on what not to do, plus board and batten wall ideas to inspire you. Learn with Chrissy Marie.

This super easy and affordable board and batten tutorial will give any space in your home immediate character and charm!

Thinking of giving your walls a refresh? Explore chic board and batten wall ideas to inspire you here!

Every Elite Shaker Paneled Wainscot kit comes factory-primed and ready to paint. Everything you need comes in the box: a PVC shoe trim, lower and upper rails, stiles, and a hardwood poplar cap trim to top it all off. Thinking of using a baseboard trim? Our kits include a 2”, ⅝” MDF spacer, which you may choose to place under the lower rail. By doing so, you increase the space between the top of the baseboard and the top of the rail. Ideally, 3 ½” would be ideal; see the how-to-install instructions for additional details.Perhaps, if you're more adventurous, consider adding panel moulding to the inside of the panels. You may add additional panel mouldings or flexible panel mouldings for curved walls. To finish the job, apply one good coat of paint after installation, and you're done. Most customers paint the wall surface and all kit parts the same colour.Need help with your layout or figuring out how much material you will need? Give us a call; our qualified design experts are standing by.Discover the Elite Board & Batten Wainscoting Kit, designed at 60" high x 8ft long – an ideal option for rooms with 8 or 9 ft ceilings. This kit effortlessly infuses modern and rustic elements into any space in your home. Forget about panels; this kit maximizes simplicity by utilizing the existing wall for installation ease. Everything required to cover eight linear feet of wall is included in the kit, simplifying the enhancement of your space.1 x Tall Wainscot Cap, with 5/8" backset, 95"1 x Shaker Wainscot Upper Rail, 4" x 5/8" 95"1 x Reversible Beadboard Wainscot Lower Rail, 8 1/4" x 5/8" x 95"1 x Modern PVC Shoe Trim, 95"5 x 47" Shaker StileWhile each component is available for individual purchase, we understand the importance of efficiency. Therefore, all items come conveniently packaged with protective materials, ensuring swift and secure shipping. Refer to the Specification tab below for any ongoing shipping specials. The Rails and Stiles are crafted from primed MDF, the Cap Trim from primed FJ poplar, and the Shoe Trim from PVC, providing enhanced impact and moisture resistance.*Actual length is 95”, the maximum length allowed for parcel shipping.Help Choosing the Right WainscotingWainscoting Photo GalleryWainscoting FAQShaker How To Install

It’s week 2 of the ORC, which means the first change in the laundry room is in the books! All the other participants are making big changes too, so head over there to see more awesome project…

Transform your walls with this step-by-step- DIY square paneled wall molding tutorial. A great beginner level tutorial!

I have shared glimpses of my laundry room on the blog several times. You can see posts HERE, HERE, and HERE. I was wanting to upgrade the laundry room a bit and maybe even provide some more organiz…

Happy April 1st! It's hard to believe a fourth of the year is already over. But you know I'm not sad that summer is now that much closer! This post contains affiliate links for your

It’s almost moving day for us and I just realized I never shared our laundry room makeover with you! We’ve lived in this little house for the last 5 years and have been meaning to update and makeover A LOT of rooms. This was supposed to be the year of makeovers, but God had different plans for us and we’re leaving our first family home for another one…5 hours south :) Our laundry room was more like a junk room. A catch-all of sorts. ALWAYS a hot mess. When we moved in 5 years ago, I painted it, threw a few things up on the wall, and left it alone. Never touched it again. I decided to capture it in all its glory, so what you’re about to see may astound you. Real life, people. Real life. I told you. Sadsville. Ick-o rug. Dog food galore. No storage. Just a MESS!!!!!!!!!! Sadly, this is pretty much how it looked 90% of the time! It was just one of those rooms that I couldn’t figure out. Out of sight, out of mind. The tiny little dresser stored all of my table linens. The basket on the dresser stored junk mail, and an assortment of random laundry detergents. For as much space as we had, we sure didn’t utilize it very well!!!! A little guest powder bath is off to the right, so when we’d have company over, we’d pretty much take all the excess junk, throw it in a laundry basket, and toss it in the garage. At the beginning of the year, I started poring over different mudroom/laundry room pins on Pinterest. I was determined to make ours functional…and cute, too :) I’m usually the kind of person who gets an idea in my mind and immediately goes for it, but this time I decided to be really intentional. Something I really need to do more often! Who knew?! Mr. Spouse and I talked for a few weeks about what we wanted to do…we sketched out a plan…and we put it into action. Go ahead and mark that down as a first…and probably last. We’re NEVER that organized…especially when it comes to home projects!!!!! This post was the source of my inspiration…and where we got the instructions for the board & batten :) via Just a Girl I LOVED the idea of adding board and batten to our laundry room. I wanted something clean and simple…and I definitely wanted storage. A functional laundry room was a must!!! Mr. Spouse and I decided on a grey color for the walls. That dark(ish) tan made the room feel so much smaller than it is. SO…Mr. Spouse started by tearing down the shelf above the washer & dryer and then we cleaned out the room. Then we started painting. Mr. Spouse was in charge of the board & batten…I just had to paint it! It was definitely a learning process, but I’m SO proud of him! He pretty much rocked it out and everything turned out just how we pictured! He also ripped out the molding that was around the doors and then adding something a little chunkier with the little details around the edges. We had to paint the backs of the doors as well since the color looked more like an off-white after the board & batten was added. It was a LONG process, but not because it was difficult to finish. We just d-r-a-g-g-e-d our feet like nobody’s business. When it was finally finished, we sat back and swooned. We LOVE IT!!!! Total cost for the makeover…about $550! Board & Batten + Door Trim = $65 {we had A LOT of wood leftover. Definitely over purchased!} Paint = $70 Cabinets = $300 {from Ikea} Bench Storage/Shoe Cubbies = $75 {Martha Stewart from Home Depot} 3 Hooks for the Wall Above the Storage Bench = $15 {from Lowe’s} Wall Art in between the cabinets = FREE!!!! {I just spray painted our door mat white!!!! Another Pinterest inspired idea ;)} I REALLY wanted to buy a cute chevron grey/white rug for that space, but it never happened. And then we put our house on the market, so I said ‘to heck with it!!!’. Just another something to clean ;) I absolutely LOVE this little space & I’m seriously SAD about leaving it! It’s so functional….and CLEAN!!!! The storage made all the difference. And so did the paint color, if you ask me. I can already see many more board & batten projects in our new house. Now to get Mr. Spouse on board with that idea…

Our family room has seen many changes over the last 9 years. The latest being a batten board square grid wall that was just recently installed.

Flat wall in your home? Build a DIY Board and Batten accent wall in no time! Great beginner project that really transforms a room!

These modern and elegant board and batten wall ideas are sure to dramatically up the wow factor in any room.

The hottest design trend for 2024, this DIY wood bobbin trim for your board and batten will change the game! It's such a fun and darling addition to your wall paneling and it's perfect for a bedroom, playroom or entryway. You can even add them to dressers and cabinets!

We did a simple board and batten treatment on one of the walls in my daughter’s room. It is a super easy way to add a little dimension and character to a room, especially one that’s painted white! Here’s how we did it: Go to Home Depot and picked up 12 of the 11/16” X 1 1/2” primed mdf (we only used 10 but it’s good to have extra) Figure about one per foot. And then three of the the 4” craftsman baseboard for the sides and top of the wall – we already had the same size for the baseboard on our bottom. 1. Paint the wall – we used Sherwin-Williams Alabaster. It’s a great white! 2. Cut and attach the baseboard to the top, bottom (if needed), and sides. We use a simple nail gun that we’ve had forever. Measure twice, cut once! I had to make another trip back when I cut a board (or maybe 2!) too short. 3. Then calculate how far apart you want your vertical boards to be, taking in account electrical outlets. Ours are about a foot apart. We used my daughter’s music theory book held horizontally, she was glad we could get some use out of it. Getting the cuts just right so they fit snugly without much of a gap is tricky. 4. Fill in gaps, edges, spaces, and nail holes with latex caulk (we used 2 tubes) 5. Paint over everything with the same color you used to paint the wall. Her room is coming along, (UPDATE: See the finished room here!) I’m having a hard time finding curtains that work! We also are going through everything that we’ve been stashing in the closet and getting rid of ALOT. It feels so good! Hopefully we’ll be able to share it with you soon --

We're sharing our complete tutorial for the awesome grid board & batten in the office! It's the perfect backdrop for everything else to come!

How to Install Board and Batten. Today I'm showing you how I added interest and detail to my bedroom with a board and batten treatment.

I gave you a look at my guest room makeover a few posts back and promised I would share all the details… Read More

This board & batten project costs us $300. It was bid at $2,500. Price will vary depending on the size of your space, but if you can DIY it--DO IT!

Board and Batten is such an easy way to add an elevated look to any room. Its my favorite type of wall treatment! Board and batten is essentially just nail…

We created a DIY board and batten entryway by adding some dimension to the walls, paint, and some hooks for easy storage!

After much online searching, I decided to do an inexpensive board and batten wall treatment in our upstairs hallway, with a narrow shelf at the top where I coul…

How To Install Simple Board and Batten - Step by step instructions on how to install a board and batten wall - simple DIY home project for beginner DIYers

The latest project around Duke Manor Farm....Board and Batten in our soon to be music room. this is such an easy and inexpensive project.

My Top 5 Board and Batten Wall Tips to give any room that extra detail. Wall treatments are a great way to add depth to any room. Click for tutorial.

I just finished one of my favorite projects ever! I completed this board and batten wall in two days all by myself — with no power tools and little to no skills. It was under $100 — wood, paint, hooks and all. It has a big impact with little money. I'm looking forward to decorating… Read More $100 board and batten entryway with hooks

Time flies when you are trying to transform a room in 6 weeks! I can only guess that the other 300+ bloggers that are participating in the One Room Challenge are feeling the heat and excitement of the big reveals coming up this next week. I have had a few minor setbacks in this past […]

Board and Batten is such an easy way to add an elevated look to any room. Its my favorite type of wall treatment! Board and batten is essentially just nail…

My next big project is my sister’s loft area on the second floor of her home which is where I am doing this DIY Modern Board and Batten Tutorial!

Add instant character to your home with a Board and Batten Wall with a shelf! This easy tutorial shows you how to do it with easy to follow directions.

Floor to ceiling vertical board and batten for $90, a beginners tutorial using MDF as batten planks. How to trim your walls in your masted bedroom

Board and batten box molding in hallway

Time flies when you are trying to transform a room in 6 weeks! I can only guess that the other 300+ bloggers that are participating in the One Room Challenge are feeling the heat and excitement of the big reveals coming up this next week. I have had a few minor setbacks in this past […]

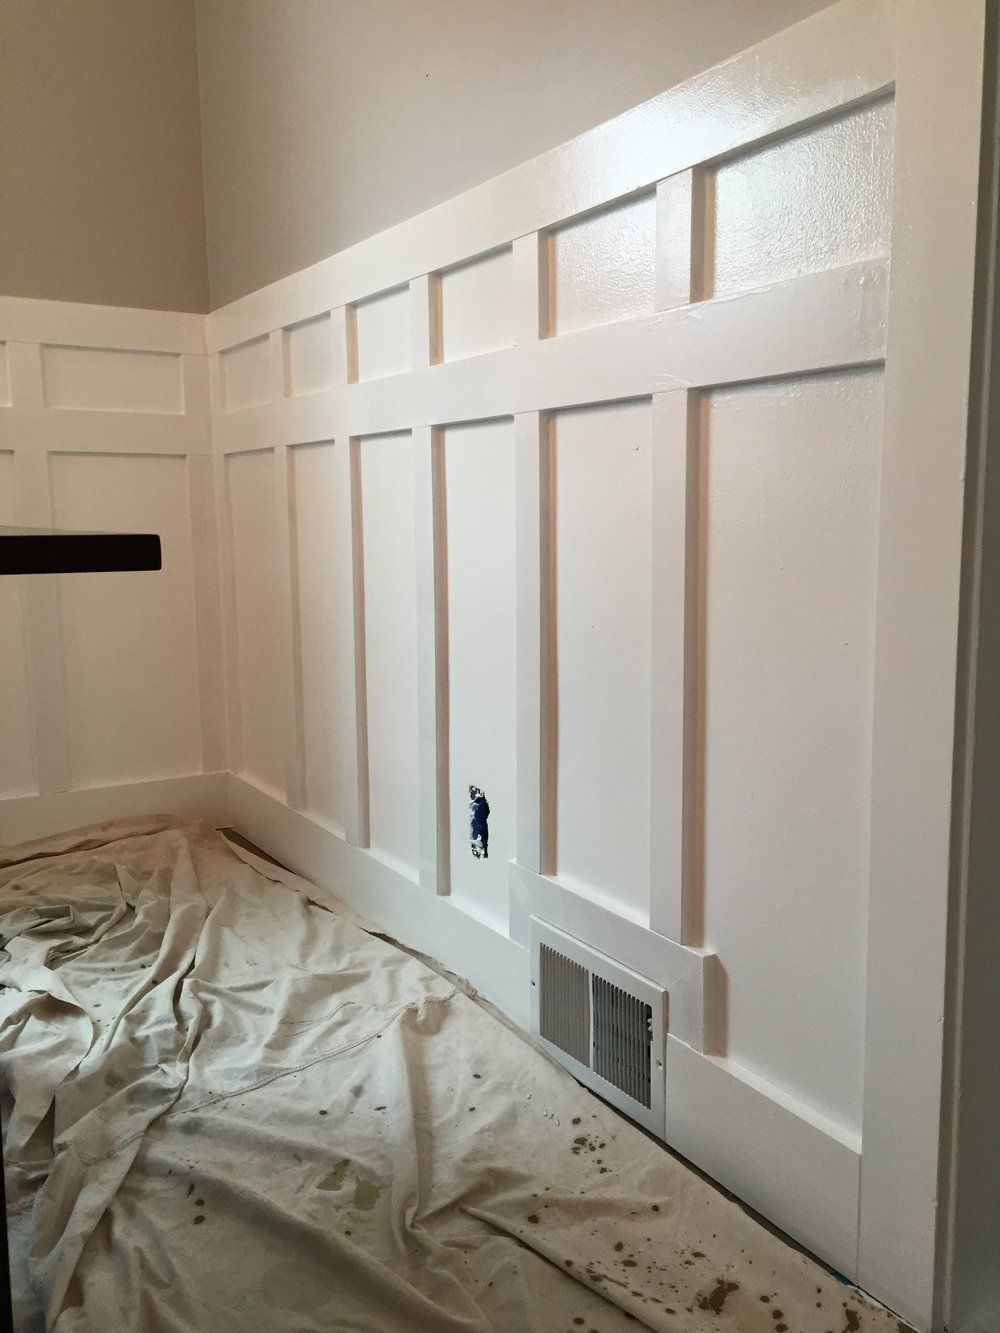
Hello! I’m back with an update on our board and batten wall, and I’m excited to report that it is about 75% done! I thought it might be helpful to share some details on how we did our …

Your entryway is the first impression for your home. I want my entryway to be warm and welcoming while showcasing our style. Our entryway is large and with all white walls, it seemed rather plain.

So, the dining room walls are finished!! I showed you the reveal a few weeks back (yes, WEEKS!). Man, I've been slacking BIG TIME on the bl...
Wow! I can’t thank you all enough for all the positive feedback from all our recent home post! It’s so nice to hear after all our hard work. One specific area

Remodeling a Small Office Space, Board and Batten, Floral, Feminem, Cozy Office Decor, Blue Floral Wallpaper, Stunning Office Space - Easy DIY Office Shelves
